Shelters for Bicycle Touring
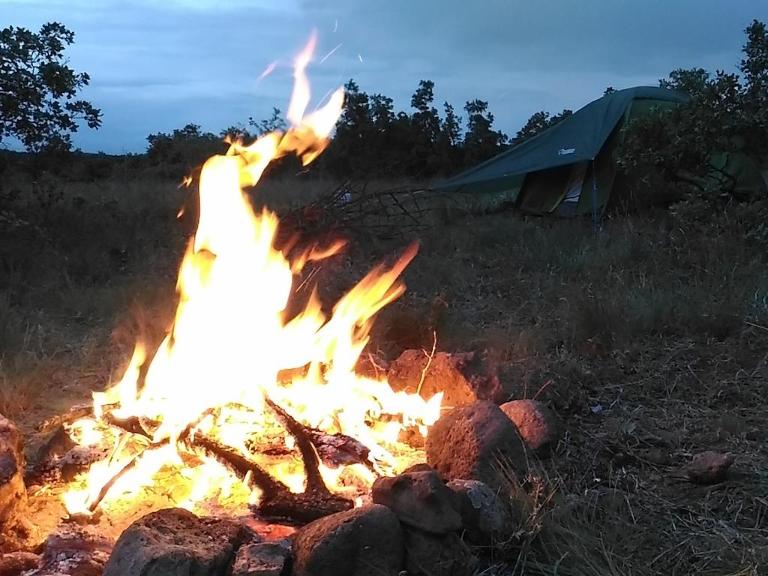
At the end of the day during a long-distance bike touring adventure, you want to experience a nice restful sleep so that the next morning you will be ready to get back on the bike and head out into the world once again. For some people, a nice air-conditioned room in a hotel or motel holds the key to happiness. For others, the lure of the great outdoors beckons them to spend some time outside listening to the frogs' croak and the bugs' chatter. Morning is often accompanied by the sound of birds singing and roosters crowing.
We'll discuss the various shelters that are available and often used during a bicycle touring adventure. Examples include hammocks, tents, tipi’s, bivy sacks, tarps and of course just sleeping outside with nothing more than a blanket or sleeping bag.
Some things to consider when choosing your shelter type include protection from the elements, privacy, safety, comfort and of course the physical characteristics of your choice in terms of weight and bulk to name just two.
You should also consider the time of year that you will be travelling in. Choices for wintertime camping are not usually the same ones you would make for a summertime adventure.
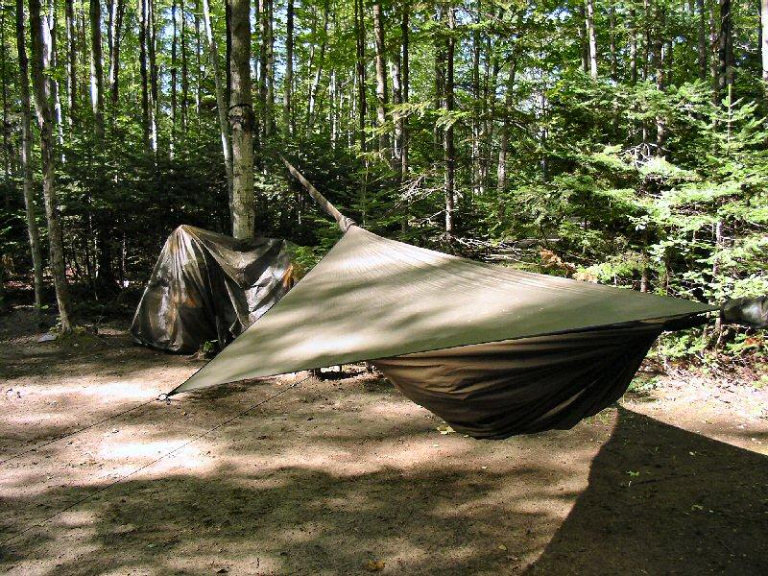
Hammocks for Bike Touring
Just before leaving home to circle Lake Erie on a bicycle touring adventure, I decided that I wanted to reduce the weight I was carrying on the bike. One very good candidate for a drastic weight reduction was my tent.
At the time I was using a relatively roomy two-person tent that came with a huge vestibule. Between the poles, tent pegs, the fly and of course the main body of the tent I felt like the tent weighed about ten pounds.
Additionally, the length of the poles was longer than my saddlebags were high so I always ended up carrying that weight on top of my rear rack.
I narrowed my choices down to two different types of shelters. One was a small tent called the MSR Microzoid. I actually found one setup in demo mode at a Mountain Equipment Co-op in downtown Toronto, Ontario, Canada. Grabbing a Thermarest from the nearby display I proceeded to try out the tent by laying down inside it. It seemed like a rather tight fit.
That comment is funny in light of my final decision. I returned home and did some more looking. Just as I was about to purchase the tent anyway I learned of the Hennessy Hammock.
Opinions about the hammock
Description
The Ultra-light backpacker version of this hammock weighs 1.5 pounds, can be set up between two trees up to 30 feet apart and includes a fly, bug netting and for me a very comfortable night's sleep. As an added bonus it comes in a nice dark brown making it ideal for camping in places where you would prefer not to be bothered. Some people might even use these for Stealth camping.
Options
There are a number of options available for the hammock including the long lines already mentioned above, snakeskins that make setting up and taking down the hammock incredibly easy as well as giving some additional protection from rain and varying lengths of tree-hugger webbing straps to facilitate going around different sized tree trunks.
For cool to cold weather camping, there are also attachments that add insulation to the hammock. The devices consist of an underpad, an overcover and an undercover.
How well does it work?
During my Round Lake Erie bicycle tour, I watched a rapid weather change occur while camped just above the exposed cliff face of South Bass Island. Lightning was crashing all around and the trees were shaking initially from the wind and then later from the lengthy downpour that lasted throughout the night.
At first, I wondered how well the hammock would handle such an exposed position in a storm with winds raging upwards of 80 km/hr (as I discovered the next morning). After five to ten minutes I stopped worrying and fell asleep to enjoy a nice, dry and relaxing night. In the morning I woke up to discover that the sleeping bag and the inside of the hammock were completely dry.
Unfortunately for the occupants of three nearby tents, including two high-end new ones, they had the joy of waking up wet and needing some drying time.
I experienced more storms while camping on other tours including my touring adventure around Lake Huron. So far I haven’t woken up wet yet!
How hard is it to setup and take down?
I can set up and take down the hammock in less time than most people can do the same with a tent. I also have many more options for setup when compared to a tent. I don’t worry about the slope of the ground and I do not need a flat, cleared space. As long as there are trees and I can run the lines then I have an easy time.
I intend to write an actual article detailing how to set up the hammock showing the snakeskins, tarp, lines and how to tie the single knot that is needed. I will add the link once it’s available.
What if there are no trees around?
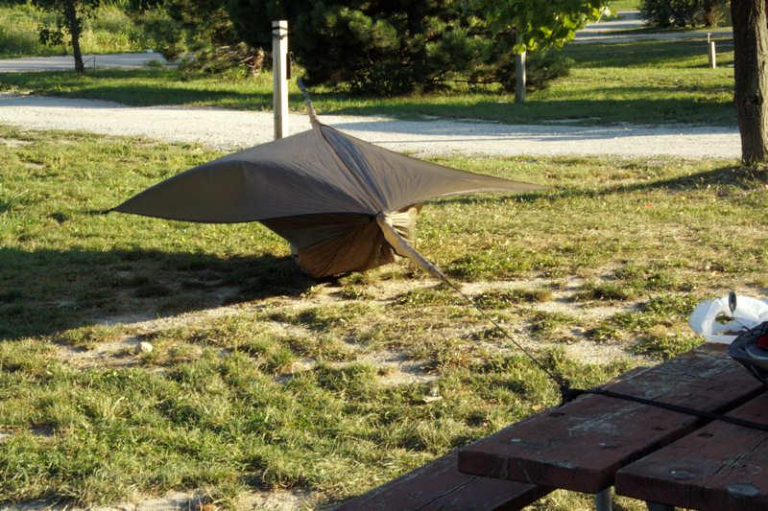
Some people have used walking sticks to hold the hammock off the ground at the ends. This prevents the netting from hitting your face and allows you to use the hammock as a bivy sack. This is discussed on the Hennessy website.
A similar thing could be done using two picnic tables or possibly a picnic table and the bike. I need to do some experimenting but I don’t see why it wouldn’t work.
I have always been able to find trees on my tours so it hasn’t been a problem. If you are concerned then make sure that you obtain the extra-long ropes that allow you to hang the hammock from trees up to 30 feet apart.
Tips and tricks
I always bring my Thermarest along with me. Hammocks are surprisingly good at transferring heat from your body to the surrounding air. The extra insulation from the pad is very useful on all but the very hottest days. Having the Thermarest along also gives me more comfort should I need to sleep on the ground due to missing trees. When using it in the hammock it’s generally almost completed deflated.
The ultra-lite version of the hammock has a 200-pound limit (please verify this). This weight includes you and any gear that you bring in the hammock with you. If you need to hold more weight than 200 pounds there are other hammocks available.
I think the major reason you sleep so well in the hammock is because of the even support. When tent camping I’m always tossing and turning because of discomfort at the pressure points. A lot of times I’ll wake up and my arms or legs are asleep. The hammock cradles you and puts even pressure across the whole contact area of your body, distributing your weight. I noticed some cold spots in the 15 or so times I used it last year. So I bought the undercover and pad to take care of that. I got the overcover because “you never know.” You have to train yourself how to get into your sleeping bag in one of these. The first night can be rather frustrating. Another major advantage is the compactness. I was able to take a few pounds off the bike. Plus I can stuff it in a front bag taking the weight off of the back tire and lowering the bike's centre of gravity.
I bought the undercover, overcover and pad but hadn’t had a chance to check them out till this weekend. I was sick of being in the house so I figured I’d get a short distance from the house and check out the new gear. I wanted to be far enough away so I’d give it a decent try and close enough to make it home before I froze to death. The night was clear and the temp dropped down to 36 F. I was using a 15-degree bag, fleece pants and jacket and a regular cotton sheet as a bag liner. Along with the underpad, I used a space blanket. My pressure points still got cool but not overly so. Once I took the sheet and put all of it under me I was fine. Of course, that little trip to the men’s tree first thing in the morning was a little brisk!:)
The over cover is worth the extra coin as it did keep the inside toasty. When you move you can definitely hear the air below in the hammock. It was rather wet up by the head end in the morning but took just minutes to dry out once the sun made it into my site. For the first time since I got the Hennessy, there was dew on the bottom side of my fly. I was able to brush most of it off before it thawed. This was probably because I tied in tight to the hammock to minimalize cold airflow. Seeing how most of my camping will be done in warmer weather I believe the new cold-weather system is a success. I did have a little trouble with the hammock getting twisted around the ridgeline and because the undercover hid it I had a little trouble figuring out what was going on. Then again I was setting this up by moonlight and I couldn’t see that well. I also purchased the longer straps so now I can swing from Canadian size trees!
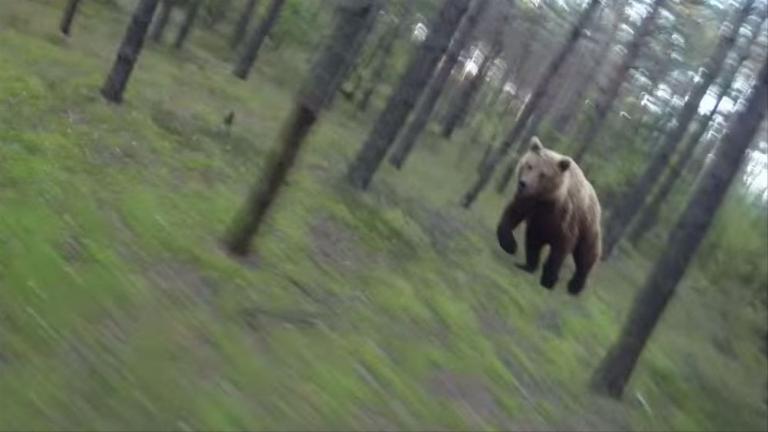
Hammock danger
It was a dark and stormy night when I started putting up my hammock in preparation for a night of restful and dry sleep. The rain was driving downwards with the intensity of a high-pressure shower drastically limiting visibility, especially when looking upwards. I chose a likely set of stout looking trees. The trunks felt strong and were certainly more than thick enough based on my previous experience hanging a hammock.
Eventually, the hammock rose between the two trees and its welcoming dry interior drew me like a moth to a flame. Just before climbing inside, I performed my routine check of applying some downward pressure to the hammock to help tighten the lines. Everything seemed snuck and ready to go.
After changing into my sleeping clothes I climbed into the hammock in anticipation of good sleep. Unfortunately, the next few seconds were impacted by the descent of the hammock to the ground in a jerky, ratchet-like manner followed less than a second later by an incredibly loud crashing noise as one of the supporting trees crashed to the ground a foot away from where I ended up in the hammock.
After this shaky first attempt, the driving rain forced me to restring the hammock between two more trees and attempt to have a restful night despite the close call. Had that tree landed on me then I could easily have been injured or even killed.
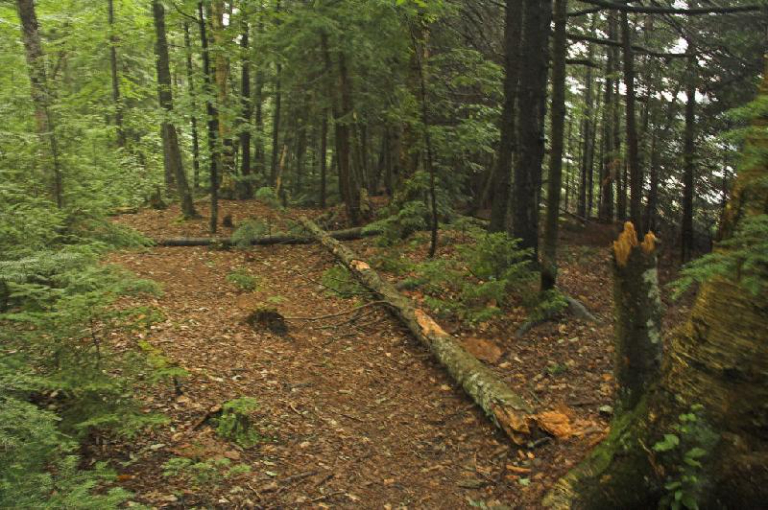
The next morning I checked out the tree in the strong sunlight. It quickly became apparent that the tree I chose in the rain had some internal issues in the trunk that had greatly weakened it. The tree was also surrounded tightly on all sides by other trees making it difficult to see above the lowest branches. It was the tight interweave of the surrounding branches that likely prevented the tree from coming down directly on the hammock. The problematic tree had no branches at the lower levels but higher up I could see dead ones showing that the tree had likely died sometime before I arrived. The weight of the tree was quite heavy and had I been underneath it trying to push it up then I believe that I would have experienced an incredible amount of trouble getting out from underneath it.
I was using a Hennessy Hammock at the time of this incident but it wouldn’t have been any different had I been using a different hammock type. Once my weight was applied to the hammock the trees were forced to either carry the weight or collapse. For the first time a tree chose to opt-out and had I been in a less densely forested area it’s very likely the tree would have landed directly on me. By the time the tree is speeding towards the ground, it’s too late to do anything about it.
Protecting yourself against this problem seems deceptively simple. Take the time to look very carefully at any tree to that you intend to attach your hammock. Look for signs of damage, holes in the trunk and of course the presence of dead branches above. These are things I had always done in the past and that I intend to continue to do moving forward. I believe that in this case, a major contributing factor was not being able to look up and see the dead branches due to the driving rain.
This event occurred last summer before my Lake Ontario tour. I went on to use the hammock another ten times without any problems. I intend to use it again this summer during all of my tours.
A hammock and no trees
During my Round Lake Erie tour, I came to a state park in southern Michigan that had no large trees in the campsite area for me to hang my hammock. It was raining that night and the park staff decided to grant my request to camp amongst the large trees in the beach area rather than make me use my hammock as a bivy sack along the ground.
Last year I circled Lake Ontario and unfortunately, I visited two campsites that didn’t allow hammocks to be attached to trees. One was in New York State at a state park north of Niagara Falls while the second one was in Ontario at a conservation area in Toronto.
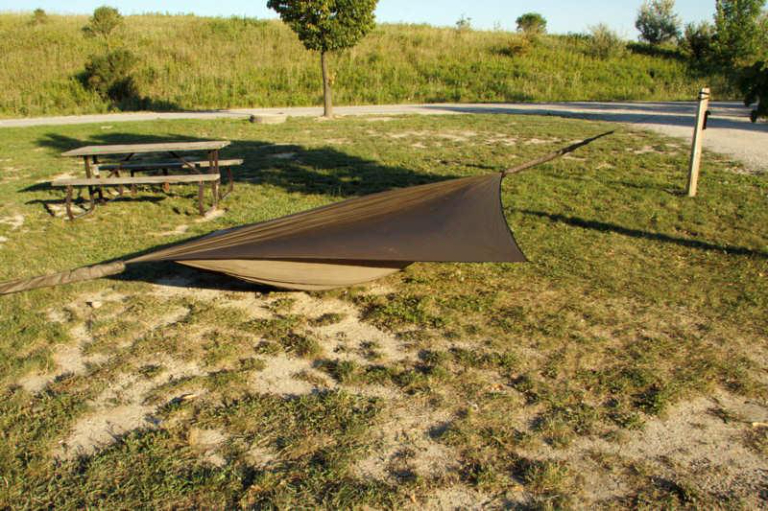
Luckily using a hammock isn’t that difficult. The entire trick is to get the hammock fly and bug netting above your face. You can do this rather easily using sticks, picnic tables, signposts and other similar objects. Remember that you don’t need the objects to hold your weight and the weight of the hammock. All that you need is enough tension in the mainline to hold the stuff off your face. Some people like to take walking sticks or light tent poles along on tour so that if they end up in a region where trees are scarce then they have an easier, more controlled way to get everything set up.
The other problem is related to how hard the ground will feel when compared to the wonderful luxury of a hammock in the air. For me, this wasn’t a real problem either because I still bring a Thermarest pad on tour with me. I carry it because hammocks are very, very efficient at removing heat. By taking along the Thermarest I obtain the ability to have it protect me from large heat loss and mosquito bites through the hammock’s outer skin. While there are other, lighter options available few of them can also act as a reasonably comfortable cushion against the hard ground.
Remember that out of well over 117 hammock sessions I have only experienced two times when I was required to sleep on the ground. With all the convenience that I obtain from a hammock and the vastly improved sleeping experience, I receive when I use one I fully intend to keep on taking it with me.
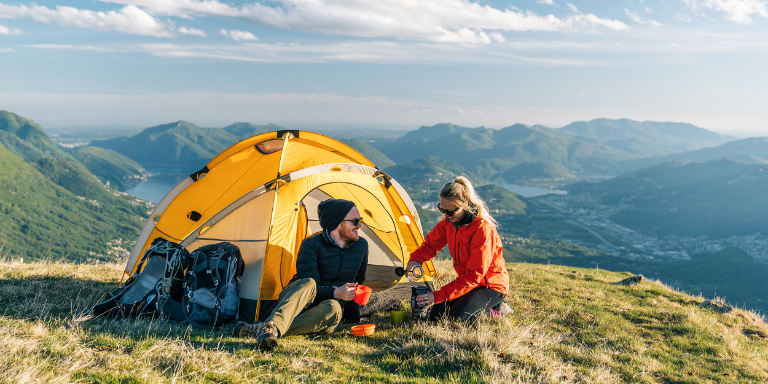
Choosing a Tent for Bike Touring
Your choice of a tent is one of the most important equipment decisions you have to make. A strong tent will stand you in good stead, but be prepared to pay upwards of £200/300 Euros or about $300 in the United States. Yes, you can get nice tents for less, certainly in the USA, but in this case, we are talking about paying full retail for comparison’s sake.
A cheaper tent may well stand you in good stead for many short summer trips, but the purpose of this article is to focus on tents which will last longer and in tougher conditions. I have seen plenty of cheap tents destroyed in a moment by strong winds, or leaking, tearing, splitting, broken poles etc.
Look at two-person tents even if you are travelling solo; you’re going to spend a lot of time in your tent and you will need space in the tent for doing chores as well as for comfort. And who knows, you might have guests! There are some nice solo tents available which have large vestibules, alleviating the claustrophobia unless you have to zip everything up at night, but generally, they are not flexible or comfortable tents and ventilation can be difficult. If you are travelling as a couple you ought to think of a two to three-person size and make sure the tent has a large vestibule for all your gear and for cooking in and enough space that you don’t fight!
Expect the weight to be 2.5-3kg including everything. It is not worth paying extra or giving up space or strength for the sub-two kilo tent; leave these to hard-core backpackers. An exception is if you are only looking for a one-person tent - take a look at Hilleberg’s Akto if you can. If you are ordering a tent from the internet, check the weight figures carefully first; manufacturers’ figures are often used by mail-order shops without checking and needless to say, manufacturers are often optimistic. You may learn a lot more from a visit to a specialist shop, fishing scales in hand.
Aluminium poles are the standard in good tents. Think about where you want to go on this and future trips. If you are definitely headed for the mountains, consider a four-season tent; otherwise, three-season tents are fine for the job and the better ones have been used by bikers going through the Himalayas.
As a rule, tents tend to be designed for the weather in the countries where they are made. European tents generally work well in the rain and cold weather, American tents ventilate well in hot weather and are often designed to stand up to strong winds. The better New Zealand tents have excellent rain protection and work well in the mountains. Top brands from the USA are The North Face, Sierra Designs, Marmot, and Mountain Hardwear. They all make some excellent four-season and three+ season tents with three or four poles. Four season tents usually have steep roofs to shed snow and often have four poles to support a snowfall, and they typically have two doors to facilitate escape if you wake up to your front door covered by a snowdrift.
If this sounds like overkill for your type of travel, look at the stronger three-season models, which may be more comfortable in terms of a high-volume shape and larger doors. If you can, choose a drab, natural coloured tent, which will draw less attention than a bright coloured mountain tent.
High-quality European names are Vaude and Salewa of Germany, very expensive Hilleberg of Sweden, and Terra-Nova of the UK. Terra-nova’s Voyager tent is one of the most popular among those bikers who have either deep pockets or generous sponsors. Its virtues are extreme strength and wind resistance, extra length for tall people and a good vestibule to cook in. Terra-Nova’s new Laserlarge tents are worth a look, but they are made of thinner material - take care on a long trip. Vaude tents are affordable, good all-rounders which are usually a natural shade of green. Salewa makes some classic mountain tents, strong and compact in design. Hilleberg is best known for its tunnel tents and is highly rated by its owners. The Nallo GT, for lightweight and a large vestibule to cook in and store gear, has been mentioned by numerous cycle-tourers, but it retails for 1,000 Euros! Hillebergs use very thin nylon coated with silicone. They are more of a cold-weather tent than a hot weather tent. New Zealand’s MacPac makes some of the best tents in the world. Their tents have extremely thick groundsheets and all their trekking tents perform well in high winds. The polyester flysheets don’t sag when they get wet. Their Minaret tent is a classic two-person mountain tent, though a bicycle touring couple ought to go for the larger Olympus.
One design which works well for bikers is the tunnel tent such as the MacPac tents. These are especially sturdy if you pitch them lengthways into the wind. They also go up and come down quickly which is useful in high winds and rain, especially as the inner tent usually remains attached to the flysheet. You pack your panniers while inside the tent and jump out at the last minute to take down and pack the tent. The only disadvantage to tunnel tents is that they are not freestanding and must be pegged out to stand. People who take tunnel tents on long trips tend to grumble a bit when they pass through really high country and cannot get their tent pegs into rocky ground. Be inventive, take extra nylon cord to lengthen the guylines so you can reach far enough to find some soft ground or tie your guylines around rocks. Take extra tent pegs and a variety if possible for hard ground and soft ground. If your tent comes with pegs that bend easily, replace them all before you go.
Avoid ultra-light tents as there is usually a loss of strength and long-term durability, besides a much higher price. A recent long-term test of tents against ultraviolet light revealed that some of the most expensive and lightest tents fared the worst. Polyester flysheets generally held up better against UV damage but it was clear that the thicker flysheets did best of all and this is why the weight savings of tents below 2.5kg are not worth the extra expense, as you are giving up strength and long term durability.
There are a couple of tents designed with bikers in mind with vestibules large enough to accommodate two bikes. Covering your bike at night is a luxury rather than a necessity but these are high-quality tents. Vaude’s Monolith is 3.8m long, weighs 4.4kg, and is a comfortable place to spend a rest day. MSR of the USA makes the Velo, a smaller tent of similar weight, but it is freestanding, although the vestibule must be pegged down. Terra-Nova’s Laser Large 2 also has a very large vestibule, which the makers claim will fit two bikes. All these tents are 3 season tents and have a large amount of fairly thin nylon in relation to just a few poles. Not recommended for windy places or mountain travel.
Whichever tent you choose, use an extra groundsheet underneath. It keeps mud off your tent and takes the beating your tent would otherwise receive. It reduces condensation under the tent floor so that when you pack up, your tent will be fairly dry underneath while the groundsheet will be damp on the side facing the ground. It’s not necessary to buy the custom-fitted groundsheet made by the tent maker, they are expensive for what they are, and blue polythene tarps serve just as well and cost next to nothing.
If all this sounds like too much expense and a blow to the budget, go with what you already have, but if you are using a cheap tent, be more cautious choosing a campsite, avoiding open spaces, hills and beaches and sticking to campgrounds or woods where you can find a sheltered spot. You will meet lots of travellers with cheap and cheerful tents - we met a Japanese biker travelling down the Pacific Coast of the USA on a bike for which he paid $20 and a tent which cost 75 cents. It had no poles, so he had to find trees to tie the guylines to, but most important of all, it did not stop him from making his trip. A German biker we met in New Zealand had a one-pole tent, basically waterproof but he had to accept the odd blow-down every now and then, and sometimes had to spend a few hours drying things out. He told us he never worried because he only spent the equivalent of €100 on the tent and felt he had nothing to lose.
Be sure to carry some SeamGrip in your repair kit. This urethane-based glue is excellent for sealing seams on your tent. Most decent tents come with the seams already sealed (to prevent rain coming in through the stitching) but if your tent is not sealed, apply a thin bead of SeamGrip to the side of the tent which is not coated with the durable water repellent (DWR) coating, as the glue will not stick easily to this side. SeamGrip makes excellent repairs, using either a repair kit or any piece of thin nylon or polyester, preferably matching the original material. The large tube will seal the seams of a tent, but this glue dries out quickly once opened and ages even if unused, so the small tubes, though more expensive, might be best for a road trip.
Hydrostatic head
It is common nowadays to see figures given for the hydrostatic head of a flysheet or floor of a tent and this has become a useful measure for comparing the degree of water resistance of tents. The hydrostatic head figure gives the maximum vertical height of a column of water to which the fabric is waterproof, ie. The water pressure that the fabric can withstand. A tent floor of 10,000mm, ie water-resistant to a 10m high column of water, is as strong as you are likely to find. Flysheets are thinner than groundsheets, and 6-7000mm is a strong flysheet while 3000mm is adequate. Rolf Hilleberg, the owner of Hilleberg, the tentmaker, warns that this test is not always performed to independent standards and buyers still need to be cautious in using these figures. Tents with thinner flysheets will still be waterproof, but the stronger the storm and the longer it lasts, the more likely they are to let water through. Over the tent’s lifetime, as the coating wears off and the nylon breaks down due to UV damage, lightweight tents will let in the water sooner. It’s fine to buy a cheap tent for summer camping for a few weeks a year in Europe, but for a long expedition, a better quality tent, perhaps a little heavier, will last much longer.
Tent pegs
Commonly overlooked, because they come with your tent so you don’t need to choose them, tent pegs are what holds your tent up in a storm and for a long trip, it’s worth getting good ones. From left to right, the choice of tent pegs covers the cheapest on the left to the best pegs on the market on the right. If your tent came with pegs like the example on the far left, throw them in your recycling bin and get better ones, and give some thought to whether the tent itself is good enough for extended touring. The second and third pegs along are made from steel and aluminium respectively. They are both light, good for general use and the easiest to put in and take out by hand but will bend in hard ground and on a long trip you may have to straighten them once a week by bashing them with a stone.
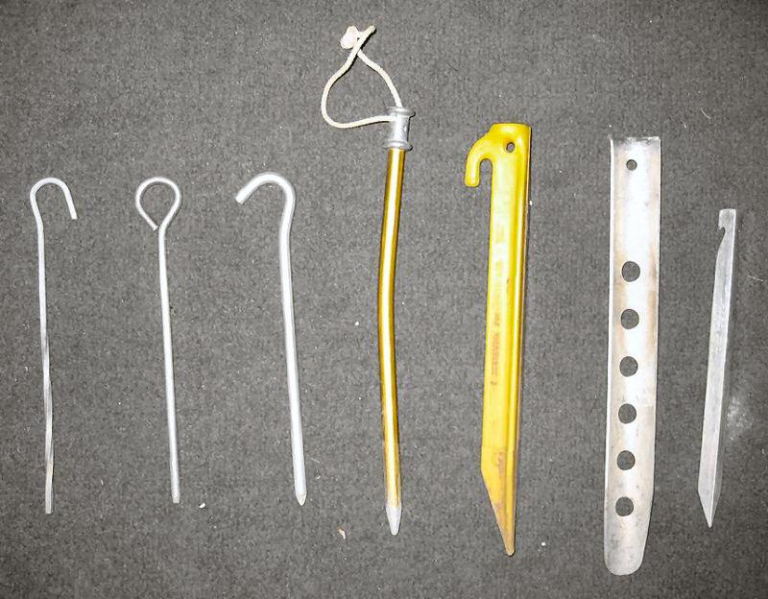
The peg in the middle is made of tent pole aluminium and is the most expensive. It is excellent in soft or hard ground, but not quite as strong as it looks (notice the bend in this one). Hit this peg hard off-centre and it can snap instantly. The big plastic pegs, usually yellow, are very good for soft ground, sand or snow and if they are damaged, they can be sharpened or filed back into shape. The large aluminium peg to the right is reasonably light for its size and is designed for sand or snow. Its blunt tip makes it a poor performer on hard ground.
Recommendation for hard-core campers:
The peg on the far right is the far strongest peg I have used. It is not hand-friendly and needs pushing in with a boot sole or stone and pulling out with another tent peg or a loop of nylon, but it will not bend or break and is excellent in hard and soft ground. The V shape provides rigidity and gives it a lot of stickiness in soft ground. This is the only type of peg I use on most trips, but beware: it is not friendly to bare feet either.
Setting up a tent to withstand high winds
Virtually any tent can survive high winds if it is properly tied down. Unfortunately, most tents do not have proper tie-outs to make this possible. Also, many campers do not understand how to properly tie down their tents, even if it has adequate tie-outs. Just shoving stakes in the ground, without thinking about the wind forces on the tent, is inviting the tent to collapse if high winds occur.
Here are some tips to help a tent survive high winds.
Make sure all tie-outs on the tent fly connect to the tent poles underneath, not just to the tent fly fabric.
To properly brace a tent, the guy lines need to connect to the tent poles underneath the fly, and preferably to a junction of two or more poles. A guy line that attaches only to the tent fly fabric, and not to the poles underneath, might help prevent the tent from blowing away in high winds, but it’s not going to add much structural strength to the tent frame. This is one reason why sewn-in tie-outs are better than the various mechanical gizmos that people use to create tie-outs on the tent fly. With a sewn-in tie-out, you can add velcro tabs on the back that you can wrap around the tent poles and create a secure mechanical connection between the tie-out and the poles. All quality tents I know of are built this way, so use this method to add tie-outs to your tent fly if you are using an inexpensive tent that isn’t built this way. Also, when you are adding tie-outs to your tent, be sure to put them relatively high up the sides of the tent – about 1/2 to 2/3 of the way up from the ground to the top. This will enable you to brace the upper part of the tent that catches the most wind. Again, if you examine quality tents, that’s where you will find their tie-outs.
Each guy line to the tent should be perpendicular to the tent pole arc or as close to that as practical.
Once a tent has tie-outs that all connect through the fly to the poles, the issue then becomes the proper use of the tie-outs to brace the tent frame. The strongest bracing comes from guy lines that are perpendicular to the tent pole arc. Of course, that will mean tying some guy lines upward as well as outward (e.g., to a nearby tree), but this will provide the strongest possible bracing to the tent frame. If you have nothing tall and strong to tie to, and you have no choice but to stake your guy lines to the ground, then at least make the guy lines as long as you can, to make the angle between the guy line and the pole as close to perpendicular as practical. And if you want truly bombproof guy lines, use two stakes on each guy line, driven into the ground in a “^” formation.
Use two guy lines on each tie-out and tie them so that they are perpendicular to each other as well as perpendicular to the tent pole arc.
With two guy lines on each tie-out, tied perpendicular to each other and to the tent pole arc, you will brace each tie-out in all three dimensions: the pole will brace the tie-out along the pole’s axis, while the two guy lines will brace the tie-out along the other two perpendicular axes. This three-dimensional bracing adds amazing strength to the tent frame. Likewise, if you must stake the guy lines to the ground, stake them so they make a 90-degree “V” at the tie-out.
Make sure the tent has a to-the-ground rain fly and extend it if it does not.
Tents that have short rain flies invite the wind to grab them and tear them up. If your tent does not have a to-the-ground rain fly, then fix the problem by stitching a nylon extension onto the bottom edge of the fly. Use coated nylon and you will add both wind protection and rain protection.
Using the above tips, almost any tent – even a cheap fibreglass-poled dime-store tent – can withstand high wind. The key is to add extra tie-outs, guy lines and stakes to help brace the tent frame.
Bivy Sacks and Bicycle Touring
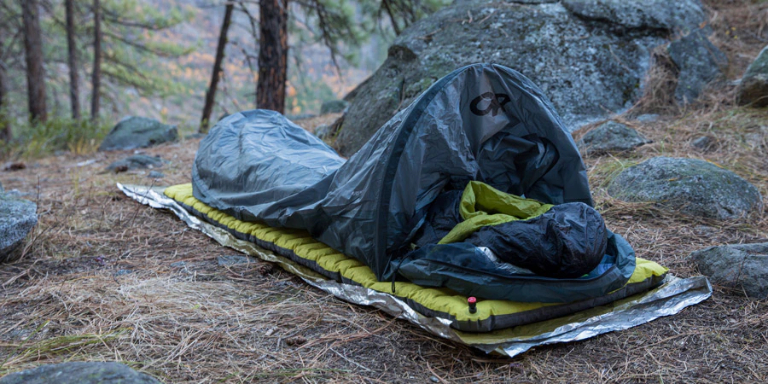
A bivy sack is a small, one-person shelter which is more like a sleeping bag cover rather than a tent. In a lot of ways, it is just a big waterproof tube you stick your sleeping bag, mattress and yourself into.
If you want to travel light and fast, they deserve consideration.
Pros of Bivy Sacks
- Lighter weight than a conventional tent. They often weigh in at less than 3 pounds.
- Smaller ‘footprint’ – you can set it up in much less ground space than a tent.
- Ease of setup
Cons of Bivy Sacks
- They don’t have much extra room in them for changing clothes, reading or other activities.
- Sometimes they don’t ‘breath’ very well and can get clammy inside.
- You, and only you, are going to fit in one. It’s solo only (but read below).
Opinions about bivy sacks
As I said above, Bivies can be great for when you want to be in and out without a lot of fussing around with a tent. In mountaineering, we used them as emergency shelters or for base camp use when at elevation. I have used them in deplorable conditions, but slept very well at 15 degrees and 50-75 MPH winds at a wind chill of brrrrrrrrrrrrrrrrr …. so they work….
To set one up, you pretty much just have to roll it out or unfold it, stick in your sleeping bag, crawl in and you are sleeping.
Some come with a small pole that you use near your head to keep the material off your face and to get rid of that claustrophobic feeling. Others also have a small pole that does the same thing around your feet.
The material used in these can make a critical difference in what sort of environments they are best suited for. The Bibler Tripod Bivy, for example, uses a waterproof membrane material that is second to none in performance. That’s great at 15,000 feet where the air is cold and dry, but not so great (generally speaking) down at normal altitudes or in wet, rainy or humid conditions. The humidity and your own breath from condensation can have you swimming inside the thing pretty quick.
Outdoor Research makes a very popular bivy and was the first to use the pole design around your head. They also make a version (or at least they used to) for two people. But at that point, you might want to consider a tent given the limitations on space and the additional weight. Sorry, but you can’t mate two regular-sized bivies together like you can with sleeping bags…
The pole around your head makes a huge difference to a lot of people, and I would recommend that you consider these types as your first choice. Yes, they tend to cost more but the extra headroom and ventilation more than make up for it. You’ve worked too hard today for a crummy nights sleep, don’t you think?
Bivies with poles usually have a feature that allows you to open them up at the top to enjoy the stars or to get some extra air. Good ones also have bug netting, and you can stow it away when not needed..
The length of the zipper and its’ placement can be something of an issue - at least it was for me. Some bivy sacks have no zipper at all really, you just have to sort of wiggle your way into them from the opening at the top. Others have zippers that run down the side and help with getting in and out quite a bit.
The ones without zippers are lighter and simpler, but getting into one, with a sleeping bag already inside, sitting on the ground (wet, snow) is not my idea of fun.
Some even come with arm holes so you can sit in the thing and do camp chores, all the while being warm and toasty and protected from the elements.
Remember when shopping for a bivy that the required length isn’t just your own height, but you need to include extra for the foot section of your sleeping bag as well as plenty of room for your head. There’s nothing quite as unpleasant as trying to sleep in a space that is 4 inches too small.
Some bivies have enough room inside for your sleeping pad, while others have attachments that let you hook them onto the mattress. I always just used the bivy on top of the mattress, but that was always in snow. Rolling off wasn’t such a big problem because the whole setup kind of made a depression in the snow anyway which tended to hold me on top. On the normal ground, rolling off and going Thump! in the middle of the night might be a problem for some.
Cost of a bivy sack
You can pay as much as you like for a bivy sack. I’ve seen cheaper versions for as little as $50, and the top end (such as the Bibler) pushing the $300 range.
My Bicycle Touring recommendations:
Get a bivy with a pole for added headspace. The longer the zipper for ease of entry, the better. Yes, this adds to the “more things that can leak, break or go wrong” factor, but well worth it. When in doubt, get the bigger size. If I had to recommend one brand of bivy, I would go with the Outdoor Research Advanced or Deluxe Bivy. You really can’t go wrong with the design and quality of construction. Outdoor Research and Mountain Equipment Co-op (MEC) are two websites that have examples of bivy sacks.