Bicycle Touring Clothing
Imagine that it is much colder than a normal day. A massive storm has just come through the area knocking out the power so no stores or restaurants are open. You have NO opportunities to purchase warm clothing.

Layering your clothing
When you packed for the tour you packed lightly in hopes of saving weight and up to now, it’s been a good strategy for you. As darkness approaches you can feel that an already cold day is going to turn into a much colder night.
What do you do now?
I’ve experienced this situation on three bicycle tours and one eight day back-country canoe trip. Packing lightly allowed me to end the day with much more energy then if I had packed heavy weather gear that for most journeys I wouldn’t have needed.
My solution was simply to wear more clothes. I always packed a set of clothes to wear to bed at night and at least two days' worth of riding clothes. Add rain gear, a warm hat and a colder weather sleeping bag and I had a solution that would leave me with a sleep that would just be warm enough.
The minor inconveniences of going to bed looking like the Michelin Man while also using up all of your fresh clothes were far preferable to being so cold that sleep was completely impossible.
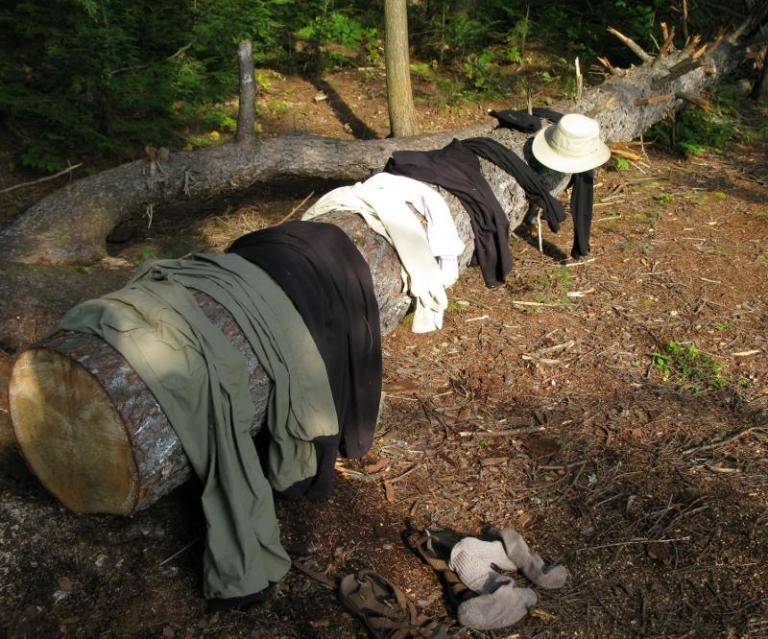
The night before the picture was taken I went to bed wearing the clothes shown plus one additional layer. This means underwear, a set of wool long johns, two pairs of pants, a t-shirt, two long-sleeved shirts, a long john top, two pairs of socks and a fleece cap. I was sleeping in a hammock that was mainly open to the air so the temperature was the same in the hammock as it was outside. Had I brought my cold weather Hennessy Overcover with me on the trip then I likely would not have needed more than two layers. The net result of the extra clothing was the ability to sleep at night and not wake up shivering uncontrollably.
Layering is a wonderful technique that can also be used on the bike for those unexpectedly cold days. When selecting your clothing before you head out on tour I encourage you to take a few moments and think about how you would layer the clothing in the event of much colder than expected temperatures.
Gloves for bicycle touring
I rode my bicycle quite well back when I was a kid and I never had gloves! It wasn’t until I was much older that I realized how useful gloves can be.
Gloves can be used to warm or cool your hands. More importantly, they also provide some real protection from road shock and road rash caused by a bad crash on your bike. Granted that I haven’t had a bad road crash for years but the problem is that you can never seem to schedule these things in advance.
So what are some of the things to look for in a set of gloves?
Road rash protection
In the event of a bad crash, your hands are very likely to come into contact with the ground. The resulting damage, often called road rash, is unlikely to make it very pleasant to do things for at least the next few days. When wearing gloves you reduce the risk of serious damage by preventing the rough ground from touching your hands as much as possible. Instead, you allow the gloves to take most of the force. Sure you may end up with wrecked and badly damaged gloves but that’s much better than extremely sore hands that might be so badly damaged that you are prevented from continuing your tour.
Warmth/Coolness
This comment about gloves is contradictory. Depending on the design of the glove they could be designed to shred heat even though they are full-fingered. Some gloves are designed to be worn while downhill biking in the summer. For this application, you want full protection but not a lot of heat.
Other gloves are shaped like lobster claws and include lots of insulation to provide warmth for your hands during extremely cold conditions. While these gloves are definitely nice to have during the winter you are unlikely to want to wear them in the middle of summer.
Another type of glove has half finger-length coverage so that you get protection for the majority of your hand while also keeping heat build-up to a minimum.
Vibration
Even when riding on a brand new pavement some vibration is transferred to your hands via the handlebars. Since it’s a good idea to hang on to the handlebars it is difficult to avoid this. When you ride on rougher roads for hours a day and for days at a time your hands can become sore.
Gloves can dampen the vibration for you. Some gloves have special padding built in to really help with this.
Selecting the right gloves for you
Sometimes on tour, the weather can turn cold and if you don’t have appropriate gear then you have to buy it. Unfortunately, this can limit your selection.
If you have a choice then try to pick something that provides the level of protection that you think you need with the level of warmth that’s required. In the winter I tend to wear lobster mitts. Summertime has me wearing half-gloves whether I am bicycle touring, offroad biking or bicycle commuting.
Last summer while going around Lake Huron the weather turned wet and cold when I reached Sault Ste. Marie. I was lucky enough to find a well-stocked bicycle shop that not only cleaned the chain for me (the original purpose of the visit) but also sold me a pair of full-fingered gloves that helped reduce the early morning chill during the next few days.
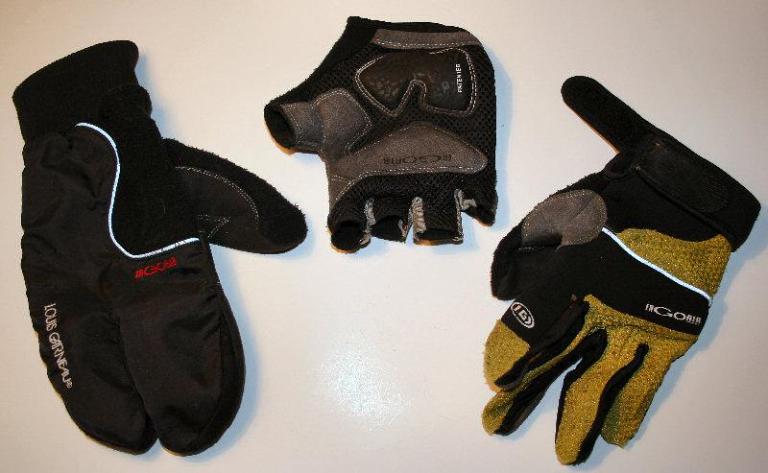
The lobster mitt is the leftmost item shown in the picture. I use this glove in cold temperatures when riding during the winter months with snow and ice all around me. My hands stay warm and usually dry!
The middle item is my short half-length glove. This glove provides me with protection while also helping to keep my hands cool and free from the effects of vibration.
The rightmost item is the full-fingered glove that I picked up during my Round Lake Huron tour. These gloves seem to be designed to help release heat in the summer so while I appreciated their ability to eliminate some wind-chill during the cool mornings I am unlikely to use these as winter gloves.
All three gloves have the same padding shown in the middle item. This padding helps remove pressure from your hands and largely eliminates vibration.
There are many different types of gloves out there and they all tend to fit a bit differently so if you have the luxury of time and selection then take your time and find a good pair of gloves that suits your needs.
Raingear for Bicycle Touring
Equipment Review - Marmot Precip Rain Jacket
The Marmot Precip Rain Jacket is made primarily for backpacking and hiking but its features allow it to double as a highly effective rain jacket for bike touring. The Precip is made from a waterproof Gore-Tex like fabric that is very breathable. The fabric is a two-layer system as opposed to the typical earlier types of breathable waterproof fabric that were three layers. This makes for a very lightweight jacket (12 oz). The jacket also is highly compactable and folds up to essentially the size of a small water bottle.
The breathability of the fabric appears to function well. In addition, the jacket has large underarm zips and also two zip vents in the front. The front zip vents also double as pockets.
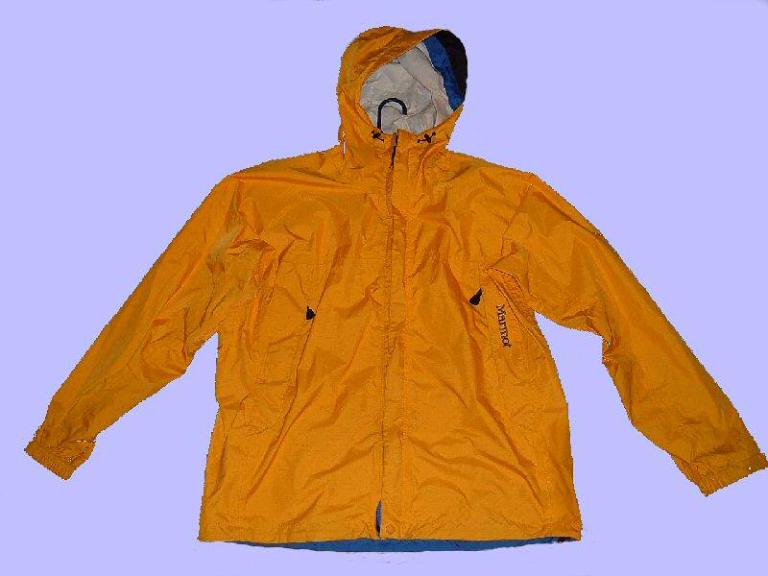
Other features include a hood that fits over a bike helmet and Velcro straps at the ends of the sleeves that you can cinch tight so that rain or cold air does not travel up your sleeves. The sleeves are cut long which is what one wants for the stretched-out position biking requires. The jacket is also cut long enough so that it covers your back while stretched out over the bike, although a longer tail would make it even better.
I have owned the Marmot Precip for about one year and have used it in all environments… cold rains, warm rains and dry cold conditions and this jacket performs admirably. Although I do get a small amount of moisture buildup when everything is zipped up, overall it wins hands down when compared to other similar Gore-Tex type jackets that I have owned. I also like the hood. For cold conditions, I put the hood up, which fits over my helmet. This instantly provides warmth. When I was looking to buy a rain jacket for bike touring, breathability, low weight, visibility, compactness, and a hood were all important factors. The Precip has all these elements.
This jacket, because of its breathability, now doubles as a windbreaker when I tour. I have essentially eliminated one clothing item by using this jacket. This jacket is definitely worth considering for anyone who is looking into buying a breathable rain jacket.
I have no affiliation with Marmot Mountain Ltd and am not being compensated for this review.
Rain jackets versus Ponchos
Rain gear usually consists of pants and a jacket but another option is a poncho similar to the one you likely used as a raincoat when you walked to school as a kid.
A good rain jacket will of course keep the rain away from your internal layers while allowing you to keep pedalling without becoming too sweaty. Great rain jackets include underarm zippers to allow you to control internal temperature somewhat as well as a zipper flap along the back to allow trapped air an opportunity to escape.
My rain jacket has all of these features and it works really well even in very heavy rain. Combined with a pair of rain pants and a helmet cover and I am ready for some heavy-duty wet weather in a very nice way.
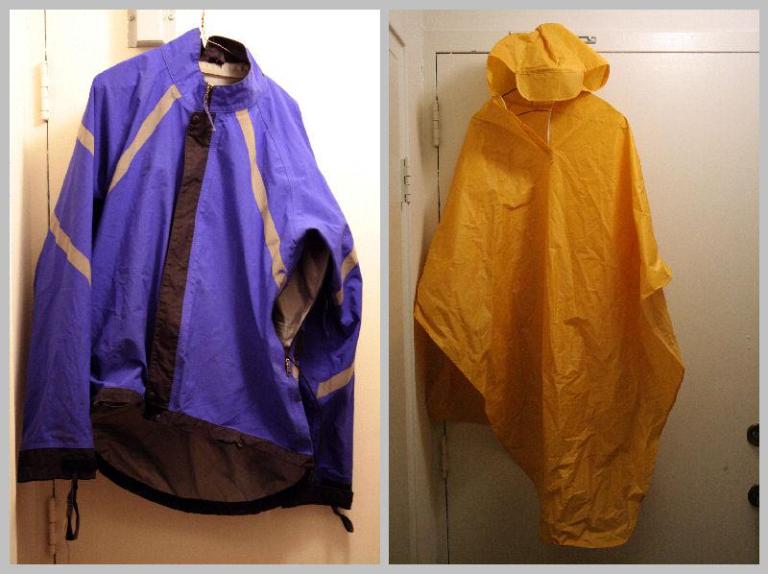
A poncho has several advantages. First and foremost they are usually quite inexpensive to purchase. Since the poncho hangs over the top of your clothing airflow is also not a problem since air can easily circulate. You can often find ponchos in various bright colours as well helping you to be visible to others in dreary conditions.
In rainstorms with only mild to non-existent wind, the poncho works very well. Unfortunately once the wind picks up then the rain begins to successfully get underneath the poncho leaving you with wet clothing.
I intend to stick with my current rain gear although if I was dealing with extremely humid or hot weather the air circulation advantages of the poncho are significant enough for me to consider it.
Bug Jacket when Cycle Touring
I haven’t met another bicycle tourist yet who carries one of these very useful bug jackets on tour with them. It’s surprising to me that I haven’t met anyone else who brings them along on their bicycle tour.
With this in mind, I decided to introduce the lowly bug jacket. I bring mine along on tour so that when I arrive at my destination in my nice smelly and sweaty bike clothing I can quickly cover up with the bug jacket and pants and proceed to put up my hammock without the torture of being eaten alive in the process.
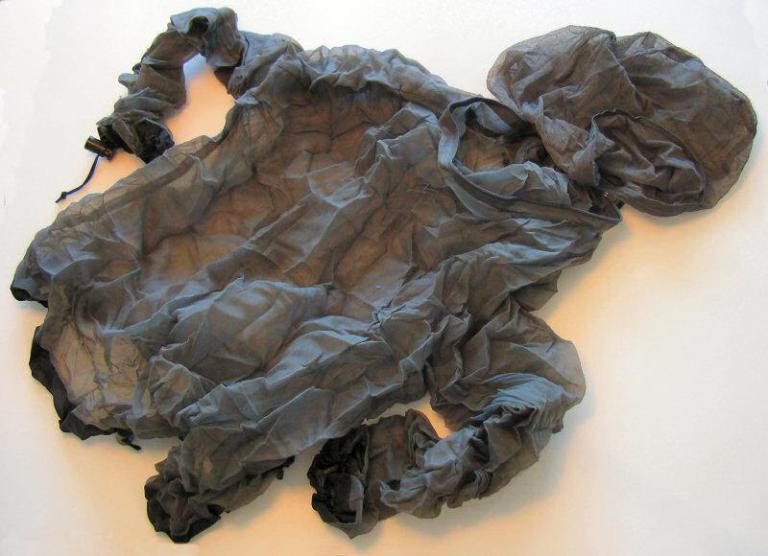
Both the jacket and pants are made out of a tiny mesh material. Very light but it can become warm if you start exerting yourself. It’s easy to fix that, you are on tour after all so take it nice and slow!
This clothing is also great when sitting at the picnic table writing up your daily journal while you cook your dinner.
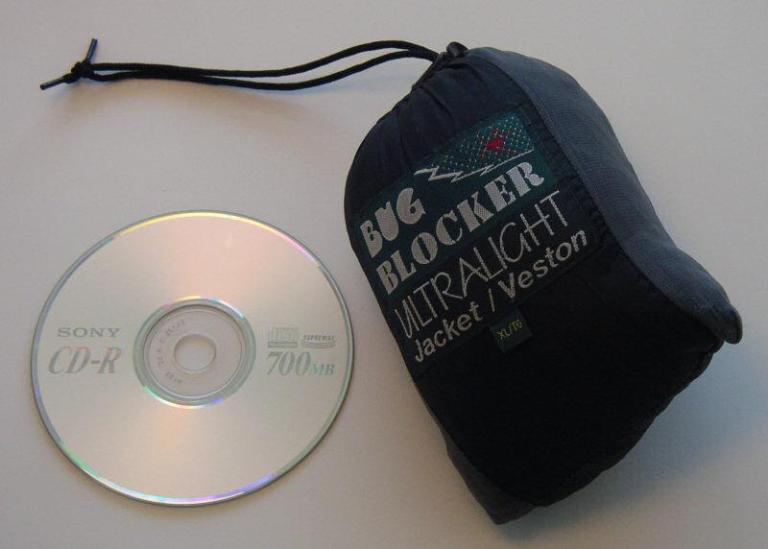
When purchasing these items go for a loose fit. You want the screen material to be very baggy. If the material is tight then the mosquitoes will still manage to sting you from time to time. Areas that should be snug include the places where the material ends. Examples of these areas include the ends of your arms and legs and around your waist. Most jackets also contain a full hood that nicely protects your head in really bad bug environments. Keep in mind the need to keep it lose through. If the netting is tight against your head then you can still come away with a few itchy bites.
People worry about carrying too much on tour. My bug jacket and pants both fit in the little bag shown in the picture, take very little room and are always readily available in an outer pocket of my saddlebags.
It’s hard to imagine a tour without them!
Enjoying the warm rain splashing up on your feet while touring in sandals
Riding in the rain while touring isn’t always the best part of a tour but there is a bright side if you are wearing sandals. One of my secret enjoyments while riding in the rain during a hot summer tour is the feel of pavement warmed water splashing off the tires and onto my feet. It’s not quite a 100 km message but it comes mighty close and it makes the rain not only bearable but enjoyable.
Taking sandals on tour has numerous advantages. First of all, they are lightweight and they take up little space so it’s entirely possible to take sandals along with another set of shoes when touring. In fact, this is exactly what I do.
Sandals aren’t limited to being useful on the bike. They are also very comfortable to wear around camp or while walking through a museum.
Many people think of sandals as only useful in warm weather. One option that many winter cyclists consider is to add Goretex socks to a set of oversized sandals to create an excellent set of cold weather footwear.
I obtained three sets of cycling sandals from three different vendors. My comments about each of the sandals follow:
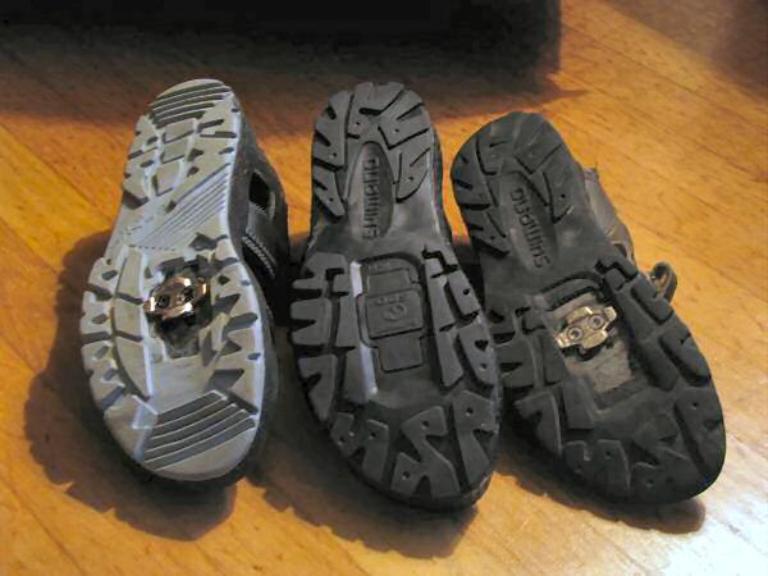
The Lake sandals have the same (Shimano) bottom sole as the Shimano sandals but have a thicker top. The Lake sandals weigh about 100 grams more per sandal, at 500 grams than the Shimano and Exustar at 400 grams. The Exustar sandals are a bit narrower than the other two. The Lake sandals have a higher front toe guard and therefore offer more protection for the rider's toes.
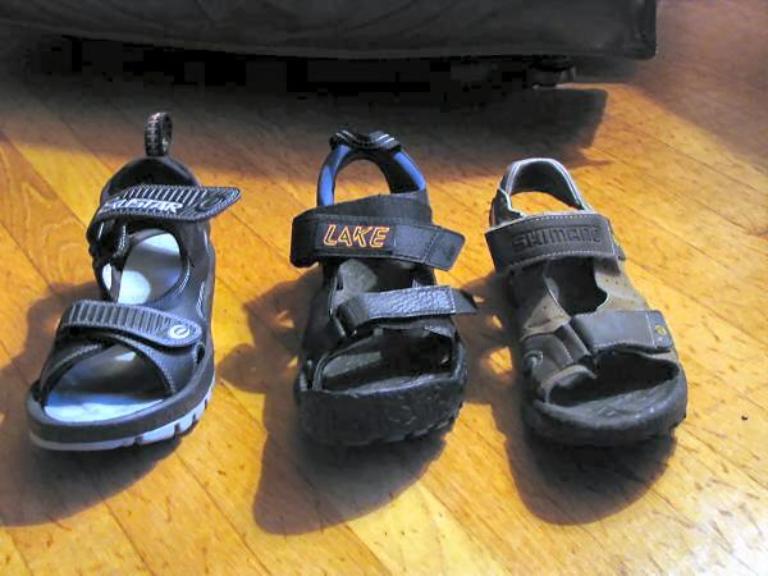
The two photos in this section show the top and bottoms of each type of sandal. As you can see from the pictures they all work with clipless sandals. The actual cleat shown in the picture is the one used with Crankbrother Eggbeater pedals.
In these images, the Lake is brand new, the Exustar has about 200 miles of riding, and the Shimano has seen many thousands of miles of riding and many miles of walking. For my feet, the Shimano is the most comfortable, followed by the Lake, and then the Exustar. All three are quite comfortable while riding, but the Shimano sole ‘walks’ better than the Exustar sole. If your feet are not wide (D) like mine, the Exustar might be the most comfortable.
I paid $75 (list price) for those Shimano sandals, but one of my other pairs of Shimano sandals was only $55 on sale. I paid $37 for the Lakes on sale and $25 for the Exustar sandals on sale. I think all three were good buys.
I have been amazed by how comfortable and long-wearing the Shimano sandals are. I’ve bought three pairs over the last half a dozen years and worn them for a LOT of hours (two thousand + on the oldest pair) riding and a lot of miles walking. By virtue of some repairs with Goop and dental floss (great for glueing and sewing things back together on tour), my original pair is still in use.
The Lakes have the great Shimano sole which is very long-wearing. I hope the Exustar sole wears as well. The Exustar uppers are a bit stiffer than the more expensive sandals, but look like they should be quite durable. I expect to get a lot of use out of all three pairs.
The Lake sandals will probably become my winter sandals because I think that protective lip on the front will cut down on the wind chill on my toes.
My newest pair of Shimano sandals and the Exustar sandals will go with me on tour next summer because the pressure distribution on the bottom of my foot changes more between those two pairs. I have had some long-lasting numbness from that pressure, and, from experience, I know that I can prevent that problem by alternating between those two pairs of sandals while I tour.