Best Type of Bicycle for Long-Distance Bike Touring
A mountain bike for touring? Perhaps a top-shelf touring bike? Touring with a carbon road bike? Maybe a recumbent bicycle is the best? A hybrid bike? Yes, anything will do, but...
Features of a Good Bicycle for Long-Distance Touring
When I consider a bike I think of the three most important criteria that surround a successful touring bike.
For me these three criteria are:
- Proper fit
- Ability to handle the terrain
- Carrying capacity
Proper Fit of the Bicycle
“Fit” is absolutely and without a doubt the key one in this list of important criteria. You are going to spend lots of time on the bike and how comfortable you are on this bike will go a long, long way towards how successful your tour is.
Rather than trying to “make something work” spend the time upfront on finding a bike that fits you properly and allows you to ride without pain. There are many styles of bikes to choose from including traditional upright bikes and recumbents.
Don’t be afraid to get out there and look at a bunch of different bikes in local and near-local bike shops. If you see a bike that interests you then ask for permission to take it for a test ride.
Consider contacting local bicycle clubs to see if anyone locally has a bike of the type you are considering. You may not get to ride the bike but many people don’t mind helping you out by showing off their bikes!
People have ridden around the world using bikes of all kinds, including unicycles, racing road bikes, mountain bikes, purpose-built touring bikes, and various recumbents.
While all of these bikes were capable of being ridden to the tour's completion it is essential to think of two other very important factors that come into play when you think of the bike.
One method to achieve a proper fit that worked for me personally was to request a “Fit Kit” session at a local bicycle shop. For me, the shop was To Wheels in London, Ontario. I arrived for my fit kit appointment and was measured for a number of things. When the test was complete I answered a few more questions and the result was a series of recommendations for how my bicycle should be set up including saddle and handlebar height to name a few.
I encourage you to mention the following needs when having a fit kit session:
More upright position
Requirement for a more upright or “see the scenery” type position. This position causes you to be a little less aerodynamic but you have the advantage of being able to look around and see the scenery. If you are using drop bars you can still get lower on those windy days when you need to avoid the wind.
It’s for a touring bicycle
This is for a touring bicycle where you will be going for long distances regularly and for multiple days. Emphasize that you need to feel very comfortable and not cramped up since the distance and time you spend on the bike one day is likely to also be the amount of time and distance you spend on the bike the next day.
Cycling shoes
Take your cycling shoes with you. This can make a real difference when you are measured for saddle height.
Testing float
If you use clipless pedals there is an additional test that you can take to measure the float setting that you should use for your pedals.
Wear your helmet
Wear your helmet when you try the sample measurements on a bike. The reason for this isn’t just safety since you will be getting used to new settings but also to allow you to see how much neck bending you have to do to look around on the bike.
Ability to Handle the Terrain
This refers to being able to safely and reasonably easily ride a bike over all of the terrains that a touring route entails. While a lightweight racing bike might be excellent for unloaded riding on smooth, paved roads it would be a very poor choice for riding on technical singletrack in the deep, dark woods especially if that singletrack included roots, rocks, sand and mud. It would also very likely be a poor choice if you needed to carry 100 pounds of gear with you on the bike.
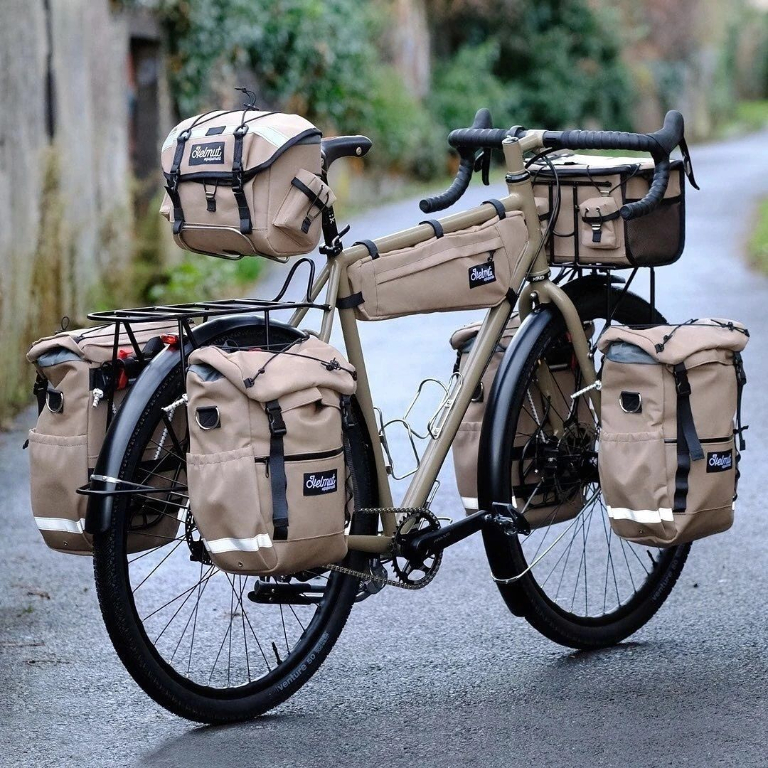
Carrying Capacity of the Bike
The bike’s ability to carry weight is also important especially for self-contained/fully loaded touring. Overloading a lightly built frame could lead to a dramatic adventure out on the road.
Conversely having to pack too lightly for fear of overloading the bike could easily lead to having to leave behind some essential comforts.
Usually, recommendations for a touring bicycle include traditional touring bikes, lightly modified mountain bikes and some types of recumbents.
Traditional touring and mountain bikes can usually handle rough terrain and carry a significant load as well. Then again there have been many instances of lightweight racing bicycles being used for long-distance SAG wagon touring.
I will follow up with some additional information on the various types of bicycles and bicycle-related equipment in the sections that follow.
Common Considerations when Choosing a Bicycle for Touring
All touring bikes seem to have several considerations in common. Before I discuss the specifics of each type of bike I would like to discuss these common considerations first.
Here they are:
- Load carrying capacity
- Mounting points for fenders and racks
- Low gearing
- Reliable components
- Water bottle holder
The next few sections will discuss each of these items in more detail. Please remember that whatever bike you choose it’s important that it have a good fit! A great bike but a poor fit is very likely to lead to an awful tour!
Load carrying capacity
When you load up the bike with 50 - 100 pounds of weight and go for a ride around the block how well does it handle it?
I currently use a Trek 520 for my loaded touring bicycle. I feel like my bike rides better fully loaded than it does with no load at all. The frame is made with carrying a load in mind and I think that it shows in the ride.
If you do the test and find that the bike feels shaky then perhaps it’s time to consider a different bike. Before you get too upset though you might consider towing a trailer behind your bike instead. A trailer introduces other issues that will be discussed in the trailer section but it is something to consider.
You might be considering just ignoring the shakes and jitters. Please keep in mind that any problems you notice now riding around at normal speeds will be even worse when your speed is either blazing fast like during a downhill or incredibly slow like you would experience during a steep climb.
If you aren’t sure then carefully do a bit more trial riding or consider getting a second opinion from some knowledgable cyclists. The last thing you want to do is experience a high-speed shimmy while descending a mountain at 60+ km/hour!
Mounting points for fenders and racks
Unless you decide to use a trailer (and sometimes even then) you will need to have a place to put your gear.
Sometimes people start a tour using a backpack or something similar to carry the load. The vast majority of these people quickly change to saddlebags or trailers before a long-distance trip has ended. While a backpack can certainly hold lots of stuff most people find them hot to wear on the back and uncomfortable.
This leaves you with the option of a trailer or racks and saddlebags. In order to use racks, you have to be able to mount them on the bike. To do this there are usually items called braze-ons. Mounting a rack to these is generally quite easy to do.
Sometimes light racing bikes are used for lightly loaded or SAG touring and the cyclist wants a rack despite the lack of braze-ons. For light loads, there are clips that you can get to allow you to mount a rack on these bikes. Usually, the amount of weight that you can carry is greatly reduced from the amount that you would normally be allowed to carry with the same rack.
Another use for braze-ons is to mount front and rear fenders on your bike. Back when I was a kid I can remember always removing the fenders from any bike that came my way with them. I used to think that they lacked a certain something.
Now that I’ve grown up I love fenders and I have them permanently mounted on all of my bikes. Why the change you ask?
Fenders protect the bike, the gear and me from spraying water. Most tours that I’ve been on have included at least one day with some rain. The great increase in comfort during those days far outweighs the slight weight gain especially when you consider that the fenders are also protecting your nice dry sleeping bag!
Low Gearing
When you load a bike with tons of cargo it becomes a bit harder to move it up hills. Even riding on flat terrain you will notice that it takes some extra effort to move the fully loaded bike at a reasonable pace over the ground.
Most bikes come with gearing designed for an unloaded and unencumbered bike. While there are numerous examples in the world of touring of people who have toured successfully there are also many who changed to lower gearing, suffered less and continued touring for many more years without gearing related injuries.
I haven’t yet heard of anyone regretting carrying lower gears even if they haven’t needed them on a tour but I most certainly have heard people wishing that they did have lower gearing.
If you have a choice when selecting a bike pick one with low gearing whenever possible.
Reliable components
Few things can wreck a tour faster than having a critical part disintegrate in the middle of nowhere (Of course some people would argue that minor setbacks like a broken bike provide an extra bit of spice to the adventure of a bicycle tour).
While you don’t necessarily have to have the world’s most expensive bike, it is important that you have a bike with reliable and trustworthy parts.
Remember that people have used bikes in various states of readiness to do continent crossing journeys. The difference between a good equipment bike with reliable components and one that is a poorly maintained wreck might come down to the number of flat tires, broken spokes and other failures.
It’s your tour. Would you rather relax watching scenery and eating ice cream or fix your bike instead?
Water bottle holder
Water is one of the most important things that you need to have when touring. Running out of water while pedalling along can be an unhappy experience!
Although there are many ways to carry water on a bike, water bottle holders are one of the most common ways of doing so.
Many bikes tend to have two water bottle holders although some mountain bikes only have one and most touring bikes seem to have three.
Water can be carried in other ways including using water bladders and saddlebag pockets so there are workarounds. Still having the ability to carry water on the bike itself is a major plus.
Types of Bikes Used for Touring
As you’ve seen in the last few sections there are numerous types of bicycles that have been used for successful touring.
This section will discuss each of the types of bikes typically used for touring.
For the purposes of discussion, I intend to focus on some of the common bicycle types that are used for fully loaded/self-contained bicycle touring. I have decided to focus on this type of touring because I believe that the requirements are more strict for this group than for the other types of touring especially when you consider the carrying capacity requirements needed by this group.
Upright/Diamond frame bicycles
Upright or diamond frame bicycles are the traditional type of bike that most people instantly think of when they hear the word bicycle. Examples of this type of bicycle include lightweight racing bikes, mountain bikes and general-purpose commuting bikes.
Many successful tours have been completed by this kind of bike. When considering an upright bicycle for touring you usually want to consider the following in addition to the info contained in the common considerations section:
- Long chainstays
- Handlebars
The next few sections will discuss each of these areas.
Long chainstays
The chainstays are the two pieces of tubing that run from the seat post to the rear axle of the bike. The term "long chainstays" is used to describe having more space between the seat tube and the chainstays.
This is important for bikes that are going to use a rear rack and saddlebags (also called panniers). Longer chainstays allow you to have more room between the back of your foot when it’s on the pedal and the front of your rear saddlebag. Few things are more irritating than striking the saddlebag with your foot each time the pedals turn! Over time you would also wear a hole into the saddlebag.
There are workarounds to some degree. You can try to mount the saddlebags further back on the rack. Some racks even come with longer mounting hardware to make this easy to do. The downside is that the more weight you have behind the rear axle the more it affects bicycle handling especially climbing steep hills.
People with smaller feet apparently have fewer problems with this.
Handlebars
Having a variety of hand positions is one very important consideration to make when trying to select your handlebars. After a period of time, your hands can become restless, numb or even painful unless you have different places to put them.
It’s not just about having a different position but also about being able to change the angles of your hands as they approach the handlebars. Carpal tunnel syndrome is a problem that may affect cyclists. It is thought that hand position on the bike plays a large role in this.
Another thing to think about is your ability to see the world. You are on a bicycle tour after all and possibly you are hoping to see more than just the pavement in front of your face. One way to do this is to have your handlebars mounted higher up. A common guideline seems to be to aim for having the handlebars at the very least, level with the seat.
I would be neglectful if I didn’t mention the issue of aerodynamics. At some point, you will experience a day with strong winds. In what seems to be an application of Murphy’s law your route takes you right into the wind!
In this situation, it’s nice to have a set of handlebars that allows you to get down lower from time to time. While you might not want to stay down low the entire time it’s still nice to know that you have an option!
Many people use drop bars on their touring bikes for all the reasons I’ve mentioned above.
When considering an upright or diamond frame bicycle common choices seem to include converting a mountain bike or purchasing a touring bike.
Touring bikes
Touring bicycles can be purchased new or used. Some bicycles that often receive mention are the following:
- Surly LHT
- Fuji Touring
- Trek 520
- Cannondale T2000 or T800
- Heron
- Bruce Gordon
- Jamis Aurora
This list is by no means complete. As time passes I will continue to update the list with links to other bicycles that should be considered.
Mountain bikes as touring bikes
In the past ten years, mountain bikes have been the best selling type of bicycle in North America. Even though only a very low percentage of these bikes are used offroad it’s the perceived features of these bikes that made them such good sellers.
When sitting on the bike you have a more upright position so you can have a much better view of the road. The wider tires cushion against road shock and the frame is perceived as being much more capable of withstanding abuse.
With all these features it’s not surprising that people have considered using a mountain bike to tour.
Surprisingly the easiest bikes to convert for fully loaded touring seem to be the ones that were popular from about 1990 to 1995. These bikes had the upright position, a sturdy frame and wide tires but few came with front suspension shocks. The problem with front suspension shocks is that you need specialized racks to be able to carry front saddlebags on this type of bike. An alternative is to replace the suspension fork with a non-suspension fork especially one with mid-fork braze-ons.
Many mountain bike tourers complain about how awkward the bike feels when loaded. I suspect that the biggest cause of this is the need to load everything on the rear rack of the bike when you don’t have the option to use front saddlebags. I experienced something similar during my first tour on Trek 520. During that tour, I did not have a front rack or front saddlebags yet so everything was loaded on the rear rack. Climbing hills was harder, especially when the front wheel would lift off the ground from time to time on the steepest grades and the rear wheel certainly appeared to be carrying a lot of weight. From the descriptions, this sounds like the same problem that a lot of mountain bike riders experience.
For those people who really like front racks and front suspension, a company called Old Man Mountain make front racks that work with suspended forks.
Multi-rider bikes like tandems, triplets and quads
Another exciting way to tour as part of a group is to ride a multi-person bike like a tandem or triplet. These bikes still only have two wheels but instead of having only one rider, several riders are on the same bike at the same time.
This kind of bike allows two or more people to work together on the same bike. This means that there’s never a concern about keeping up with each other (and hopefully never a pressing need to get some “space” - grin).
Of course, having two people on the same bike means that to some degree you are more limited in the amount of gear that can be carried. Although larger saddlebags are available you still end up with room for only four saddlebags on the bike, a handlebar bag and perhaps a trunk. Some people overcome this to some degree by towing a trailer as well.
Tandems have a reputation for being fast rides as well as giving people a real chance to test the strength of their relationship (grin). Still from what I’ve heard many people find riding multi-person bikes to be a very rewarding experience that adds an entirely new element to the touring experience.
One additional tip that I’ve heard is a strong suggestion to get some sort of a lesson about how to ride a tandem or other multi-person bike before setting off on your first tour.
Recumbent Bicycles for Touring
Recumbents have been used for many successful tours. Some of the perceived benefits include a more comfortable ride, a seating position that allows you to see the scenery, greater visibility on the roads, and a better ability to handle headwinds with increased speed.
The most common disadvantage that I’ve heard has to do with hill climbing abilities. Many recumbents are considered to have more difficulty climbing hills than upright bikes. Some of this could be due to not being able to stand up and put your weight on the pedals when the hill gets steep. Another consideration would be your ability to balance the bike at low speed.
So many possible positives and a few potential negatives make this an option that should carefully be considered. Be aware that unlike upright bikes there are a huge number of recumbent designs and change is constant for this type of bike. This means that if one recumbent doesn’t work for you it’s probably a good idea to check out a few more designs before deciding against a recumbent completely.
Touring with Folding Bicycles
One of the common concerns for tours that don’t leave from the front door of your home is how to get the bike and all of your gear to the starting point. One option is to use a folding bicycle for your tour.
A folding bicycle can be easily stored away in a standard-sized box that airlines will accept as normal checked baggage. This means that not only are you saving on potential extra fees for carrying your bike on an airplane but you usually also have the comfort of knowing that your bike is being carried just like any other luggage with fewer worries about the special handling (or lack thereof) that an oversized box or bike bag might receive.
Some bicycles come with a handy case that serves two functions. One of these functions is to carry the bike when travelling. Once at your destination the case turns into a trailer capable of carrying your gear behind the bike.
Some people are sceptical about the usefulness of these bikes on long tours. As is true with every other type of bicycle listed on this page as well as some that are not, folding bikes have been successfully used to cross major countries and continents.
Touring with Trikes
A trike is a three-wheeled bicycle. Many of the types used on tour are recumbents, either delta (two wheels at the back and a single wheel at the front) or tadpole (two wheels at the front and a single wheel at the back) type designs.
The addition of a third wheel is popularly believed to increase rolling resistance but, due to better weight distribution, the rolling resistance of trikes is on par or better than two-wheeled bicycles. Tire selection is critical though.
Another perceived disadvantage is the need to take up more space on the road and whilst it can lead to tense moments on narrow roads, the larger footprint can also provide better protection in busy traffic and the novelty value causes most road-users to give trikes more respect (and space) than upright bicycles.
Trikes have several advantages not least among them is the ability to install low gearing on the bike. Since three wheels make balancing much easier it is possible to keep on pedalling with insanely low gears and eventually make your way up very steep hills.
Trikes have been used very successfully on long tours including a 317-day tour from North Carolina to Alaska and back again by Heidi Domeisen.