Water, Water Bottles, and Water Filtering when Cycle Touring
Everyone knows the necessity of drinking plenty of water before, during and after exercising for an extended period of time. Bike touring is no different: your body needs water to work properly. Failing to drink enough water while on tour might temporarily hinder your performance and intellectual capacities such as your level of alertness and ability to make quick decisions.
There are various ways to carry water, the most common being the use of water bottles attached to your bike frame for easy access. Some prefer to carry water in a special pack from which they can drink using a long tube (e.g. Camelback). Since wearing anything on your back while biking is rarely comfortable, most people stick to bottles but I have also seen people placing their pack in their handlebar or on a frame bag while mounting their straw on their handlebar for easy access.
Water, however, is not the only thing being lost through sweat while touring. Ever noticed how salty your body gets after sports? We exude a fair amount of salt when sweating. This salt is necessary for the good functioning of the body notably by helping the transmission of nerve influx to your muscles and organs. This is why sports drinks such as Gatorade, PowerAde and the like contain a lot of water and a little bit of salt. They also contain some sugar for taste and energy. Similarly, there are packets of electrolytes on the market to help people suffering from dehydration; these essentially contain salt and a bit of potassium. Talking about potassium, bananas contain a lot of potassium and are cheap, tasty and full of good sugar… they are, in my opinion, the ultimate cyclist’s snack.
You can make your own sports drink by diluting your favourite fruit juice in the same amount of water and by adding a very little pinch of salt. One of my favourite recipes consists of pressing a lemon in a bottle of water (about 750ml), adding just enough sugar for the mixture to taste good (usually two teaspoons) and a pinch of salt. I usually tour with one bottle containing such a mixture and one containing water. I then let my body dictates its own preference along the way.
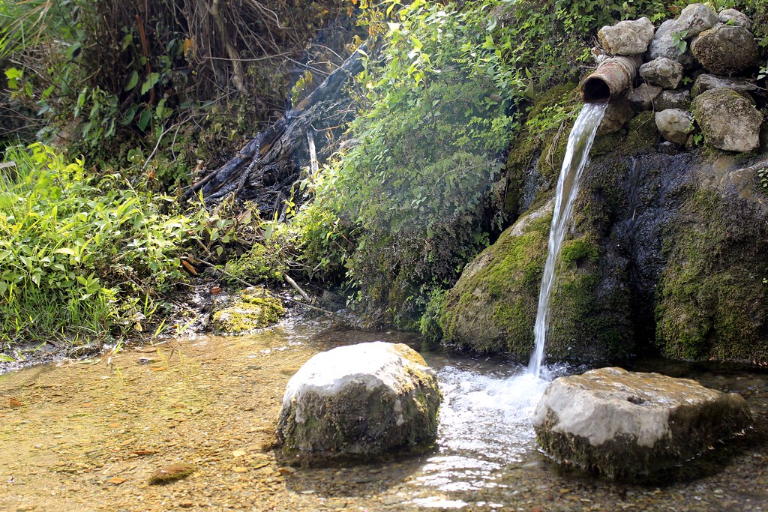
Most of the time, you’ll find places to refill your bottle on the road: fountains, public washrooms, restaurants… you can even knock at someone’s door and ask politely for water. Sometimes, however, you might have to cross areas where water will be inaccessible for more than a day. In such case, you’ll need to carry more water. The problem with water is that it adds a lot of weight and packs poorly. One way to solve this problem is to carry extra bottles in your panniers. Another way is to buy foldable water containers such as Platipus and MSR Dromedary bags; they take less space when folded and can be strapped to your racks or placed at the bottom of your pannier for more stability.
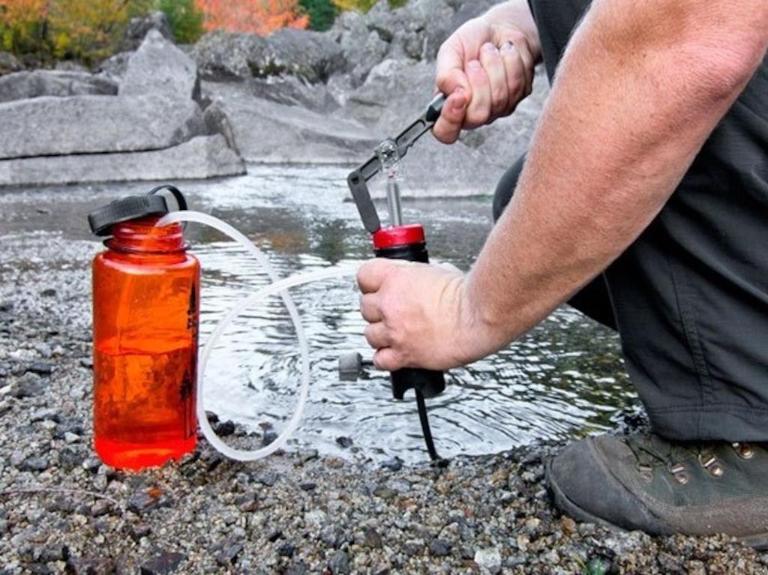
Sometimes, you might also have access to streams or lakes. In many cases, you can drink from these sources but the water needs to be treated. There are many options available in most outdoor stores. There are, for example, filters available that eliminate most of the unwanted pathogens from the water as well as iodine tablets which when added to the water kill harmful bacteria. Boiling water is perhaps one of the most effective ways of purifying water but is much less efficient at higher altitudes where water boils at a lower temperature. Some people even make their own purifying system using bleach. In any case, make sure you are using a method that is effective under the condition you are faced with.
One of the problems with carrying water on your bike during those hot summer days is that the water gets warm easily… tepid water is supposed to be assimilated faster by the body but let's admit it, we also drink to feel the refreshing effect of ingesting a cool liquid. Sometimes, the thought of drinking tepid water is so unappealing that we prefer skipping an otherwise needed drink. There are a few tricks to help you keep your beverage cold for a longer period: some people add ice and others use insulated bottles. Since you can rarely find ice when on tour and that insulated bottles only work for a few hours, I believe nature offers us a better method for keeping the content of our bottles cool.
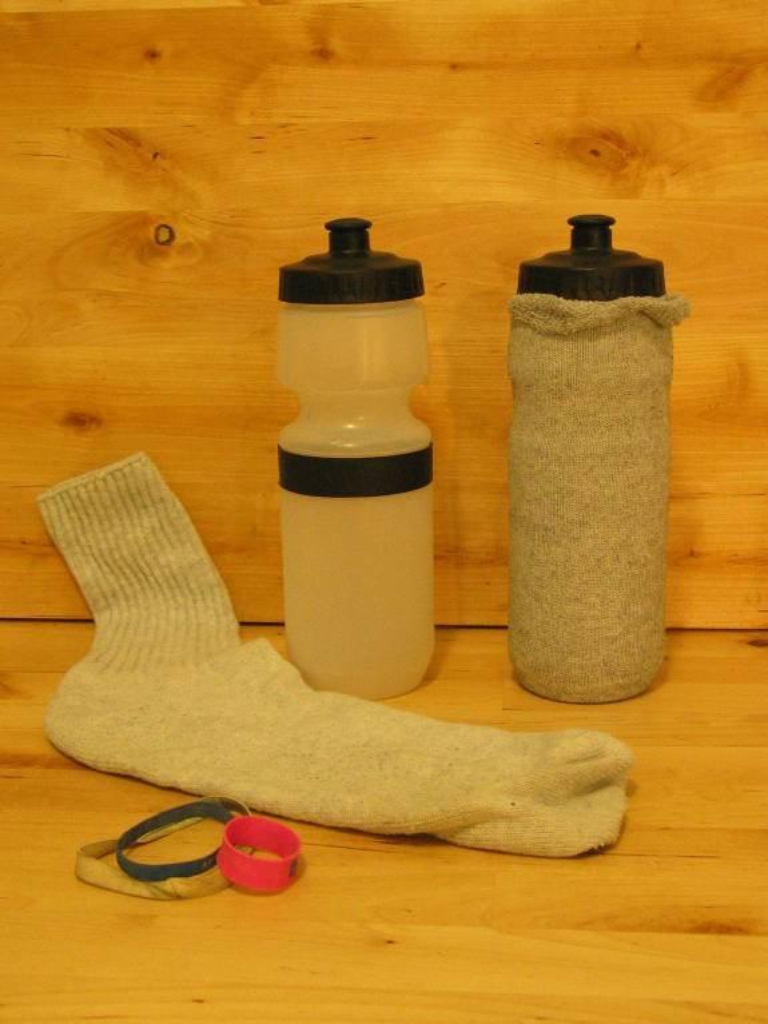
It is the evaporation of our sweat that keeps us cool in the summer. You can use the same principle to keep the content of your bottles cool. The trick is very simple and only requires an old cotton sock and an elastic band. By placing a sock around your bottle and securing it there with an elastic band, you have created a perfect envelope that should keep moisture near the bottle. Then, you simply have to fill your bottle and pour a bit more water on the sock. Once the sock is wet, all you need to do is to pedal so that the wind helps at evaporating slowly the moisture; this should cool down the bottle and its content. Many are extremely sceptical of this very simple solution; to them, I simply say: try it and judge afterwards!
Water bottles
Water is a very important item to carry with you during a bicycle touring adventure. One of the ways to carry water is to use water bottles.
Most people seem to purchase water bottles from their local bike shop but there are different options available too.
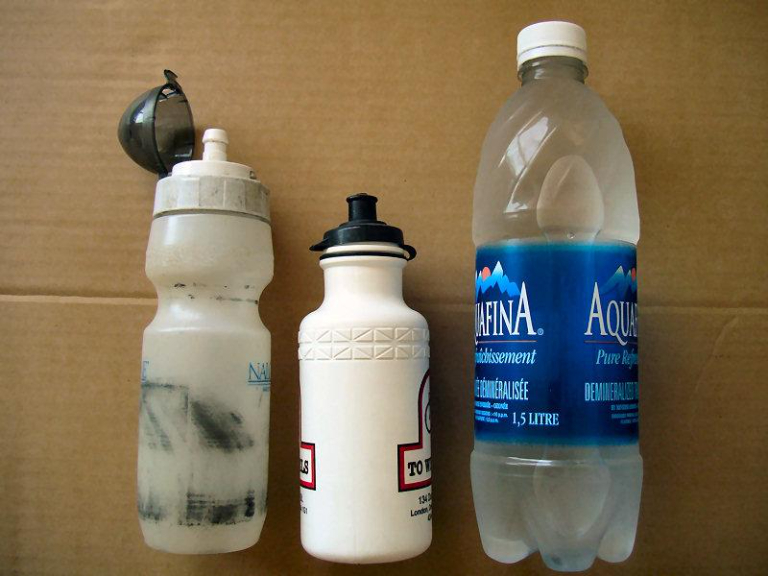
The bottles available at your local bike shop generally work well and last for quite a long time. Usually, there are two sizes available. The smallest size (the middle bottle in the picture) holds approximately 500 ml of water. A larger size is usually available as well that holds approximately 750 ml of liquid. The leftmost bottle is about the same size to give you a comparison although it isn’t an example of a typical bike shop bottle. As long as I can safely place the bottle on the bike than I usually carry the larger 750 ml bottles.
The leftmost bottle is my preferred bicycle touring water bottle. It’s made by Nalgene and has several features that I like. First of all, it holds approximately 750 ml of water so by using the bottle I give up nothing compared to the large bike shop bottles. Secondly, it features a protective cap cover that keeps mud, roadkill and other icky items of that nature away from the place where I drink from the bottle. The bottle is made of very tough material and the last key feature that I like to mention is that the bottle features a very wide mouth making cleaning easier and allowing my water filter to attach directly to the water bottle.
The rightmost bottle in the picture is a large bottle of bottled water like you might find in gas stations, grocery stores and other food locations. Topeak is an example of one company that makes a water bottle holder that allows you to carry even larger water bottles on your bike. I own a Topeak water bottle holder but I haven’t yet used it on a tour so I can’t comment on how well it works. I do like the idea of being able to carry 3.750 litres of water in water bottle cages rather than the 2.250 litres I’ve used in the past (calculated using two 1.5 litre bottles and one 750 ml bottle).
Many touring specific bikes can carry three water bottle cages. Two are the standard cages located inside the triangular part of the frame. The third cage hangs below the downtube requiring caution to make sure that the wheel does not catch on the bottle causing steering issues.
Of course, there are other ways to carry water including water bladders and hydration packs.
Water filters
Back when I was a sea cadet I took a survival at sea course. During that course, some statistics came up that I admit to vaguely remembering. They went something like a person can survive without food for close to a month. The same person can survive without water for around a week and if they drink salt water then they will last three or four days. These memories could be wrong and they should be double-checked if their accuracy is important for your endeavour.
What is known is that running out of water at any time during a bicycle tour really sucks! Few things are worst than having a dry mouth, parched lips and feeling a burning need for water while your body overheats from lack of proper hydration. Several studies in books and on the web have pointed out how little you need to be suffering from a lack of water before your body starts feeling the effects.
A similar problem is what happens when you drink poor quality or polluted water. You can experience misery in many terrible ways including the “runs”, stomach cramps, sickness and of course unplanned bowel movements. Just the kind of adventure you always wanted to experience during a bicycle touring adventure eh?
While all of these are things that could be inadvertently experienced I suspect that they are much more problematic when stealth camping where a water supply of known quality might not always be available.
Now that I’ve talked about all of the above I will admit that so far I have carried enough water on tour to not yet run out and I have also been lucky enough to not seem to find bad water supplies that cause severe effects. I have unfortunately experienced the joys of a quick run into the woods when nature calls. (grin).
For my Round Lake Huron tour, I decided to invest in a water filter. My thinking was that I would be doing some stealth camping, especially in the more remote sections of my tour and I wanted to make sure that I had sufficient water supplies of as good quality water as possible.
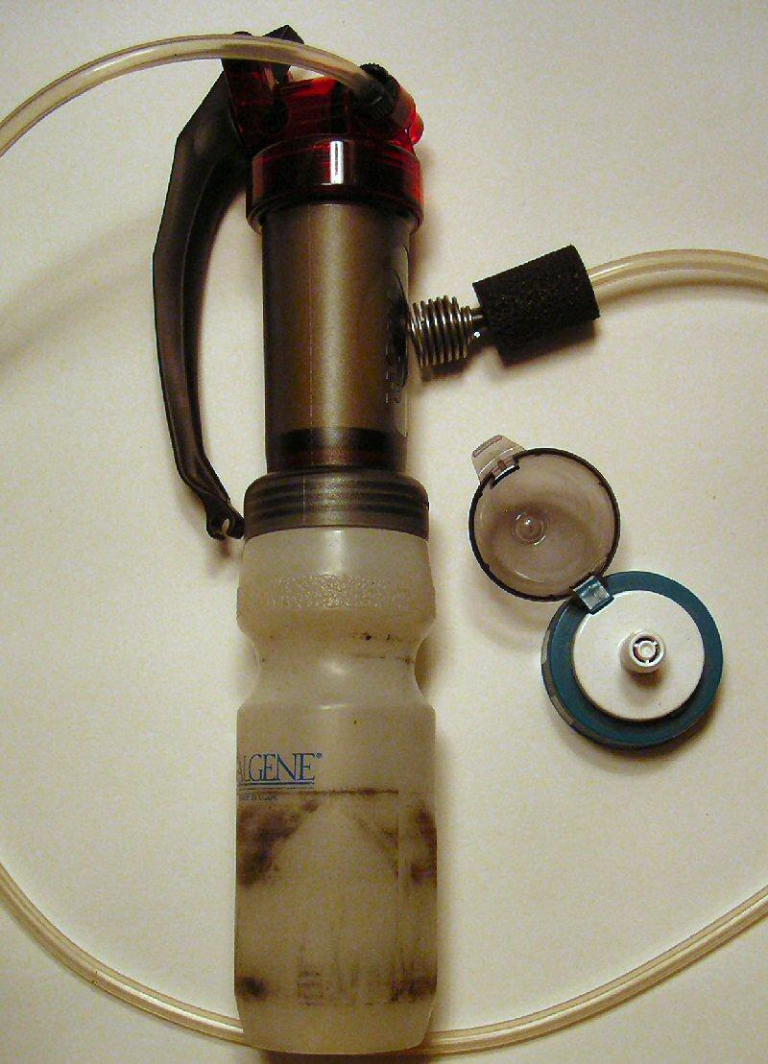
The water filter I selected will screw directly to the top of the wide mouth Nalgene water bottles that I use making refilling easy. The Nalgene bottles also have a handy cap that’s easy to drink from while protecting the part that goes in my mouth from contact with road debris.
It is very possible to tour without a water filter and in fact, I have experienced at least ten tours without having one including my trip around Lake Erie.
The water filter does indeed add weight to the load but it also gives me peace of mind. I heard many stories about “beaver fever” from Cross Canada cyclists who knew someone or experienced firsthand the effects of running out of water in a remote area and replenishing by drinking water directly from the nearby lakes, rivers and streams. With the water filter, I wasn’t worried about drinking water if I had run out at any time during my adventure and that’s a great position to be in while experiencing a great bicycle tour!
