Bags for Bicycle Touring
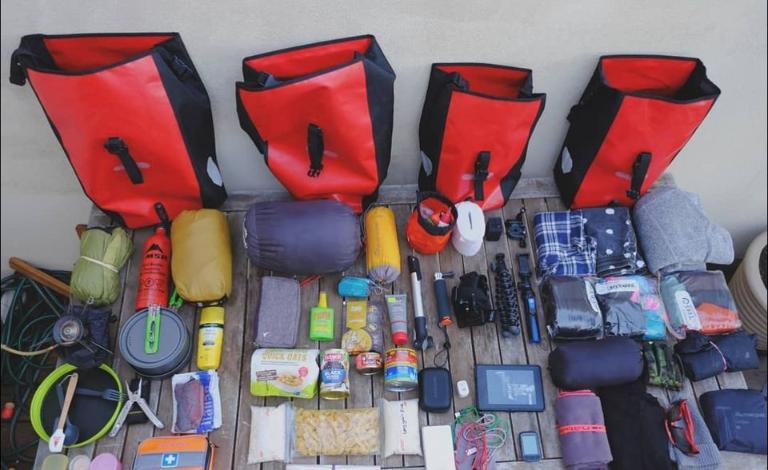
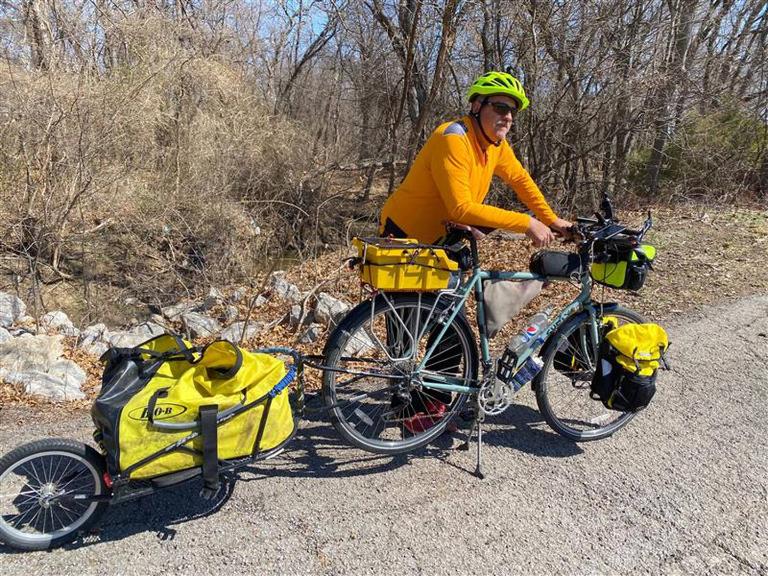
How to carry everything you need with you while touring by bicycle? There are two main ways of doing this on a self-contained and fully loaded tour. One way is to carry everything on the bike itself. The second method is to tow a trailer and carry everything in that. This page will cover bike touring bags.
To learn about bicycle touring with a single wheel trailer see this post:
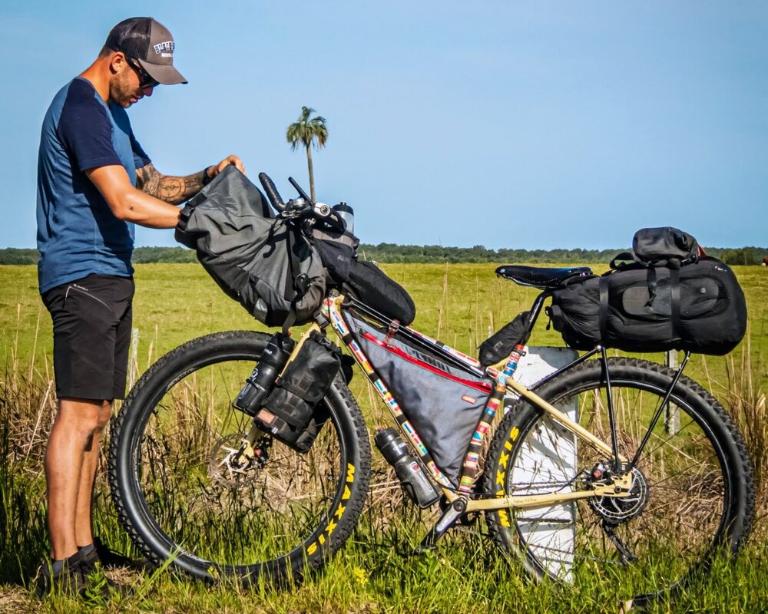
Different types of bags exist to help you make use of almost any part of the bicycle. Here’s a list of just some of the options:
Handlebar bags for Bike Touring
A handlebar bag rides on the handlebars just as the name implies. This type of bag is often used to carry items that you want close at hand. Examples include a camera, notepad, touring cards and snack foods.
Some handlebar bags also have some really nice features like a map case and a strap that makes it possible to take the handlebar bag with you when you leave the bike.
One consideration that you should be aware of is the overall weight of the handlebar bag when it’s fully loaded. Heavily loaded handlebar bags can make steering harder than necessary.
It is possible to get a map case on your bike without a handlebar bag. Some people do exactly this to get around the potential steering and weight issues on the bike.
Trunk bags for Bike Touring
A trunk is a bag that rides on top of the rear rack of a bike. This type of bag is very useful for a lightly loaded or sag wagon tour when you want to carry just a few items on the bike without going all the way to saddlebags. It’s also very useful for commuting or day rides.
Although I have a trunk bag I don’t use it on tour. Instead, I prefer to have nothing on top of the rear rack allowing me to put things there when needed. One Item that typically ends up there if I use it during a particular day is rain gear.
During my last tour, I mounted a water bladder above the rear rack. This allowed me to carry more water and remove the weight of a water bladder from my body but it also made mounting a trunk bag completely impossible had I wanted one.
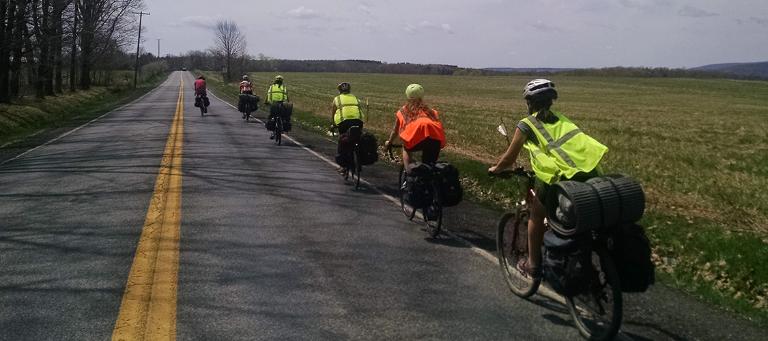
Saddlebags (also known as panniers)
These bags ride along the sides of the racks mounted on the bicycle. These bags come in a variety of colours, shapes and sizes. Additionally, you can get bags with lots of pockets to help you organize your equipment or one big pocket for your gear but completely waterproof.
Two very well respected saddlebag manufacturers are Arkel OverDesigns and Ortlieb. While both companies are recognized by many bicycle tourists as having superior products the two companies have taken different approaches.
Ortlieb is renowned for having bags that are almost waterproof. Many stories have been told about how well these bags have worked to protect essential gear like a sleeping bag from getting soaked during a heavy rainstorm.
The potential downside is that the bag has only one large compartment.
Arkel has also gone with high-quality materials and a very strong set of attachment hardware. They have also focused on providing lots of compartments to make packing your gear easier.
I currently use Arkel saddlebags although in the past I used Vaude RoadMaster bags until I experienced a problem while passing through the Cleveland harbourfront while going around Lake Erie. I sold these saddlebags to a touring buddy only to have them break during our first tour together.
For me having saddlebags that I can rely on makes a tremendous difference when I am touring. I look for high-quality construction, a reliable attachment mechanism and some form of protection from water.
I also look for straps that I can use not only for being able to temporarily hold things on the bike but also to allow me to try to compress the fully loaded bags as tightly as possible to help reduce the impact of the bags on aerodynamics. This is an important feature, especially in a headwind.
For commuting, I like to use different bags that have an easy quick-release mechanism. This makes the bags easier to take off the bike. When I tour I typically want the opposite since I tend to leave the bags on the bike for the whole tour. Some people feel differently about this. They like to take the bags into their shelter at night rather than leave them on the bike.
Of course to mount most of these bags you need a rack of some sort. The next section will cover that topic.
Choosing a set of panniers/saddlebags

Choosing your first set of saddlebags/panniers can be tricky since you are usually coming into touring for the first time and you don’t really know exactly what you are looking for. Since this question is a relatively common one I present the following message thread. Thanks to the three people identified in this thread for contributing their comments here as well.
Matthew posted the following question:
“I am in the market for my first set of panniers and I need to know what size is really needed for self-contained touring. My goal is to keep the load to around 40lbs but that may be exceeded depending on the tour destination itself.”
Demetri responded with a request for a bit more information:
“You leave off an important point, two or four panniers? 40lb is not too much for two panniers; but, as you say, you might exceed 40lb. I got 90-100lb nicely into four Madden Baby Buzzards, with a tent and sleeping bag atop the rack. I am now using Ortlieb Bike Packer Plus bags, slightly larger than Baby Buzzards. With Baby Buzzards I was using front panniers front and rear; with the Ortliebs I am using rear panniers front and rear.”
Gilbert responded with the following answer that goes a long way towards discussing the various items that you should consider when trying to choose a set of panniers that will work well for you:
“Demetri makes a good point on the two or four pannier thing. I’ll tell you if you can get everything in two panniers your life gets better in airports and off the bike carrying things around. On one dramatic afternoon on an overseas trip I was told that my international flight was canceled and the only plane I could get was scheduled to leave the ground twenty minutes from (….now)!
The counter agent that re-ticketed us comforted me a little by adding that the new tickets were from another airline, in another terminal ( shuttle bus required) and added the words; “you will never make the plane with those bikes.” HA!
I’ve toured on all kinds of bikes but lately have been travelling with small wheel Alex Moulton bikes. While they pack smaller than large wheel bikes I enjoy the way they carry a large camping load like a little mule. Anyway to speed assembly at the destination; Gatwick airport in the UK, I used the normal full size bike shipping boxes for the bikes and most camping gear. My carry on was a large front and rear bag (the Moulton can use panniers in the front but forgoes them in the rear for a huge unibag of similar size to a large pannier set). Anyway I brought along some cash for ready exchange on arrival and a few $5 bills to tip the Skycaps with our bike boxes. When we found we needed to change terminals those first two fivers went to this one happy fellow turned out to be prudence. We hurriedly explained our situation and pulled out my remaining bills; nothing but $20’s and gave him one. To our surprise he stopped unloading a car without a word came over, loaded our bike and luggage, transported them across traffic and into the shuttle bus. As we got on he had some words with the driver and gave some assurance that we were in a hurry. The bus pulled away with people screaming after it as we were the only passengers on board and pulled up to the proper terminal in a jiffy. We were immediately greeted by a new skycap and he with a fresh $20 in hand guaranteed the bikes would be on the plane when we arrived in London with 12 minutes till takeoff.
With 10 minutes to take off, we were issued boarding passes at the empty ticket counter and were then running through the concourse to the luggage screeners. As we exited security I realized the only problem now is the plane was due to depart in 3 minutes and I have little of my required luggage for the trip. We had them call to the front counter and such but ultimately I was able to board the plane unencumbered by anything more than basically a handlebar bag. And they said the bikes wouldn’t make it, Ha?
They arrived on time with us. After we returned the bags (and my precious cycling shoes) were found in the Lost and Found having been left on the shuttle bus. So much for the discount ticket after all those tips.
This silly story just shows how hard it is to keep your eye on multiple bags when travelling. With a bike box under one arm and four panniers, a tent, pad and sleeping bag dragging along you’re also very open to snatch and grab thievery as well as your arms are well; occupied.
Now there is a downside and I’ll make my recommendations on the Pannier thing now. On size, I would select the largest front and rear panniers (or rear and rear) I could find that fits your rack properly. I would try to carry as little as possible and avoid over packing and overstuffing. Why use so many large bags you ask?
One, using front bags often (it should be all else being equal) improves the tracking and stability of the loaded bike and offloads the trouble prone rear wheel of weight.
Second, large bags can allow packing things out of a high mounted handlebar bag and top of the rack and place them in a more stable, lower position improving stability and handling, keeps gear cleaner, eliminates exposure of delicate nylon to UV light and rain and is less likely to fall off the bike and should be much quicker to load. Tying down a tent, pad and bag to a rack top can often take considerable time each day compared to latching a pannier on. So if you can get your gear inside your pannier bags you have less bags to keep up with and the gear is more protected from the elements. A side benefit is if the rear rack top is free you can quite easily lash on groceries or other handy items you pick up in your travels (I’ve been needing a hubcap like that for a long time).
Side benefits:
Gear seems to expand on trips since after a while it is not folded just so, packed this or that way or simply cluttered. You're in need of room unless you discard or ship home always tends to expand on trips so having some extra room is great. With large bags as opposed to small ones, everything can fit in easily without the zipper busting tugging and squeezing to pack the panniers each morning. This is really handy when you wake up late for your plane that’s leaving that day, when the farmer is coming across the field with the shotgun or when your words sound like this, “ Well officer, just plan on me just moving along right away then.”
On pannier brand and selection:
Almost all panniers on the market today (USA) are of adequate design for occasional use. Long term and regular use will separate the better ones. Having said this the better ones can be much better with regular use; no seam failures, the tough fabric is more abrasion resistant, better coating and seals, heavier tougher zippers and buckles that don’t break.
Now, what is really important and yet few people talk about it? It’s always capacity or even weight that folks talk about. This is natural as these things are very easy to measure and are tangible.
The thing that you use the most and is most critical is not the pannier at all. It is the rack system and the pannier attachment system. Many if not most are somewhat incompatible (rack to pannier) with each other from my experience. I’ve heavily modified most of the panniers I’ve ever owned. I am told Arkel is an excellent system but have never used them. I do know Ortlieb, Vaude and Carradice have an excellent lock on hooks and a system that is very universal to fit most racks. Racks for panniers are the most overlooked component on a bike for touring and they fail often. One thing is that good name brand racks with excellent reputations often have a carry rating that is 2.5 times less than other less known brands like the tubular steel Tubus. Tubular steel racks seem to be universally more reliable but there are many excellent aluminum alloy carriers on the market. The over-design of a better carrier is not wasted as it will stabilize heavy loads, is more reliable and is more likely to survive a crash.